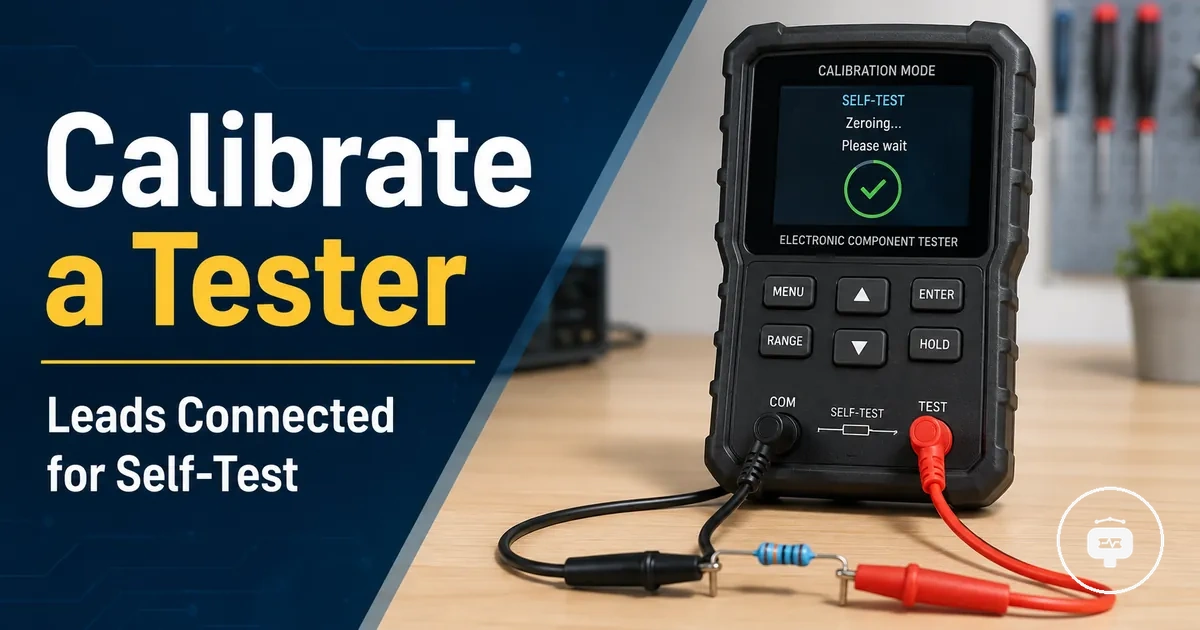
How to Calibrate an Electronic Component Tester
Calibrating an electronic component tester starts with identifying the calibration function and following the procedure intended for that tester design. Calibration is a tester adjustment process used to support more consistent measurements under suitable operating and connection conditions. It does not guarantee perfect measurement accuracy or remove every possible source of error. For broader tester functions and measurement context, see the electronic component testers hub.
The calibration procedure may involve a built-in self-test, specified test-point connections, disconnected probes, or a reference component, depending on the tester. The electronic component tester uses these calibration conditions to assess or adjust internal measurement behaviour. Connection quality, lead condition, power stability, tester state, and the required reference setup can influence the calibration result. A completed calibration process may improve measurement consistency, but the result still depends on the tester’s design, condition, and supported method.
Before starting calibration, confirm the tester’s required calibration mode, connection arrangement, power condition, and reference inputs. These preparation checks reduce setup-related errors and establish the conditions needed for the later calibration steps.
Electronic Component Tester Calibration Purpose and Accuracy Scope
Electronic component tester calibration is the process of checking and, where supported, adjusting the tester so its measurements remain as consistent and reliable as possible under defined reference conditions. The purpose of calibration is to support dependable readings rather than guarantee perfect measurement accuracy. Calibration applies to the tester, its measurement function, and the conditions under which it is evaluated, not to every possible testing scenario.
Calibration focuses on measurement consistency by comparing the tester's performance against known reference conditions before practical use. Factors such as the tester's condition, connection quality, power stability, and calibration method can influence the outcome, so results may vary between tester designs. Calibration helps distinguish normal measurement variation from issues caused by setup or operating conditions, but it remains separate from broader diagnosis of accuracy limitations and troubleshooting. For a wider explanation of measurement reliability, see accuracy checks.
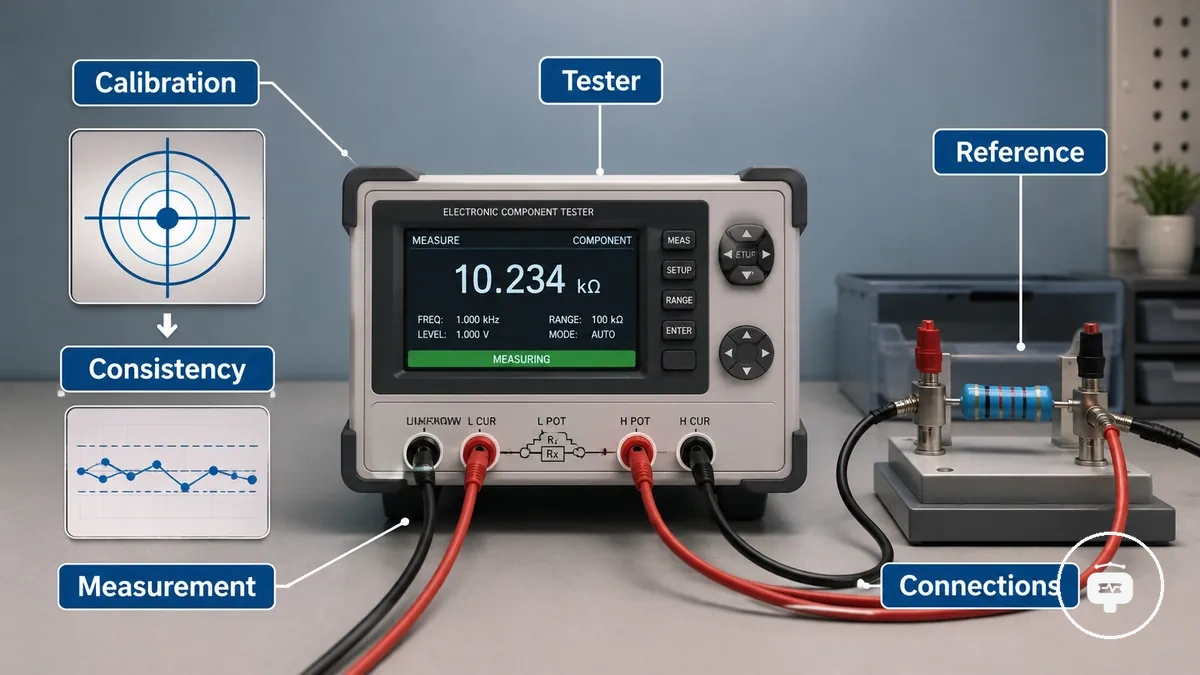
The illustration below highlights a typical calibration setup, including the tester interface, calibration connections, and a reference arrangement used during the calibration process.
Calibration establishes the operating conditions needed for dependable measurements before preparation steps or adjustments begin. Understanding these boundaries helps define the preparation requirements for the calibration process without extending into full accuracy evaluation or troubleshooting.
Preparing an Electronic Component Tester for Calibration
Preparing an electronic component tester before calibration helps reduce setup-related conditions that may influence calibration results. The required preparation depends on the tester design, calibration method, and reference conditions rather than a single universal procedure. General operating practices can also be reviewed through the tester setup steps.
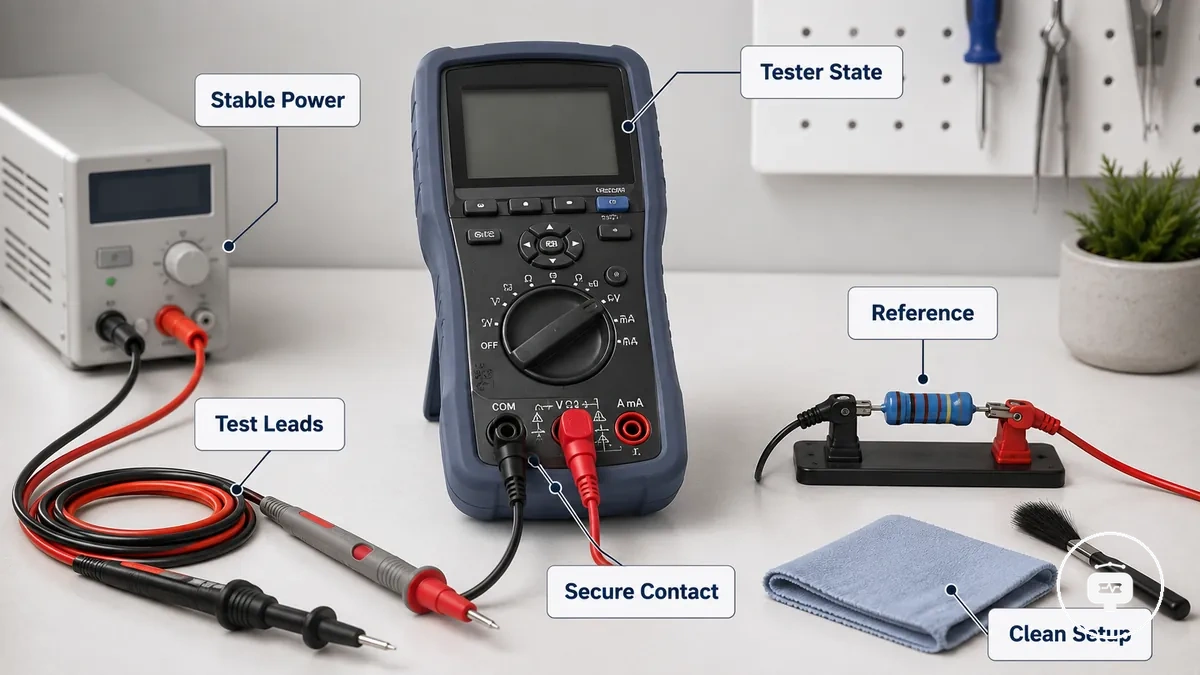
The preparation conditions shown below highlight a typical calibration-ready setup with connected leads, stable power, and an organised testing area.
- Confirm the tester is in the required operating state before starting calibration.
- Verify that the power source is stable and suitable for the tester.
- Inspect test leads and connection quality for secure contact and visible damage.
- Use the appropriate reference component or reference condition if the tester requires one.
- Keep the calibration area organised and minimise unnecessary movement of leads during setup.
- Check that all required calibration connections are complete before beginning the calibration procedure.
A missing connection, unsuitable reference component, or poor lead contact can influence calibration consistency even when the tester is operating normally. After these preparation conditions have been verified, the calibration workflow can proceed using the method appropriate for the specific tester.
Electronic Component Tester Calibration Steps
Electronic component tester calibration follows a workflow that may vary between tester designs, firmware versions, and calibration methods. The process generally progresses through calibration mode, connection checks, self-test actions, adjustment stages, and verification rather than following one universal sequence for every device.
The illustration below shows the main stages of a calibration workflow and how the tester, its connections, and calibration actions relate during the process.
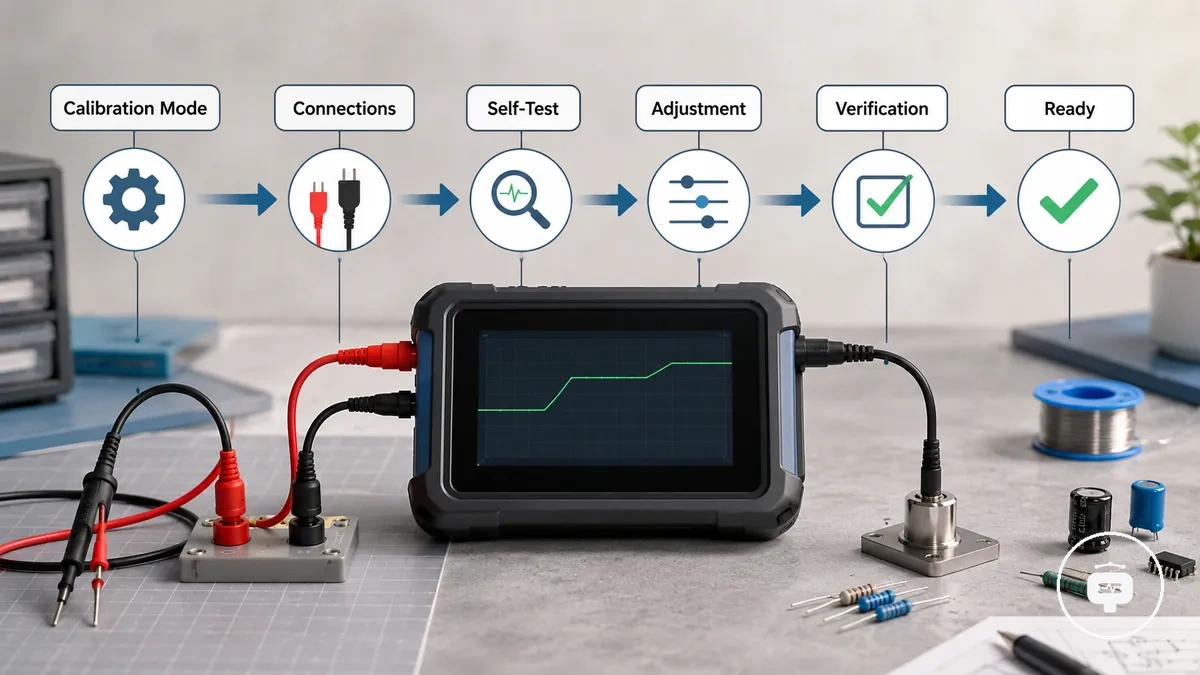
- Enter calibration mode. Access the tester's calibration function using the method available for that model. The way calibration mode is entered may differ between devices.
- Complete the required connections. Connect the specified leads, terminals, or reference component if the calibration method requires them. The required connection arrangement depends on the tester design.
- Run the self-test. If the tester includes a self-test stage, allow it to complete before continuing. Follow any on-screen prompts provided by the tester.
- Perform calibration adjustments. Complete any requested adjustment stages only when the tester indicates they are needed. The available actions and sequence may vary by hardware, firmware, or calibration method.
- Verify the calibration. Confirm that the calibration process finishes without reported errors and, where supported, verify measurements under the appropriate reference conditions before returning the tester to normal use.
This workflow provides adaptable calibration stages rather than a fixed button sequence. The exact order and available calibration actions depend on the tester's design and implementation.
Running Component Tester Self Test and Adjustment Procedures
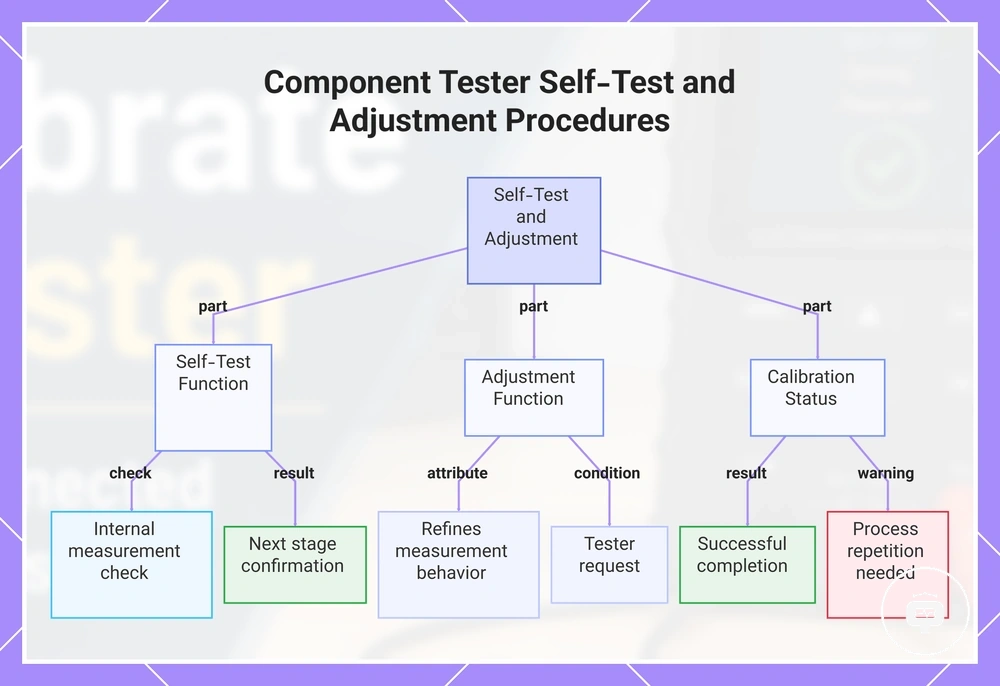
Self-test and adjustment functions support calibration by checking the tester's internal measurement process under defined conditions before calibration is completed. A self-test may confirm that the tester can continue to the next calibration stage, while adjustment functions may refine measurement behaviour when the tester requests them. These functions contribute to calibration status, but they should not be treated as confirmation of perfect measurement accuracy.
Self-test completion and adjustment conditions depend on the tester's design, firmware, and calibration method. In many cases, the tester indicates whether the self-test has finished successfully or whether an additional adjustment or confirmation step is required before calibration is complete. If the calibration status does not indicate successful completion, the calibration process may need to be repeated after the required conditions have been met instead of assuming the tester is ready for normal measurements.
This chart explains the self-test and adjustment functions that support calibration, their roles, and the calibration status outcomes.
Using Calibration Leads and Reference Components
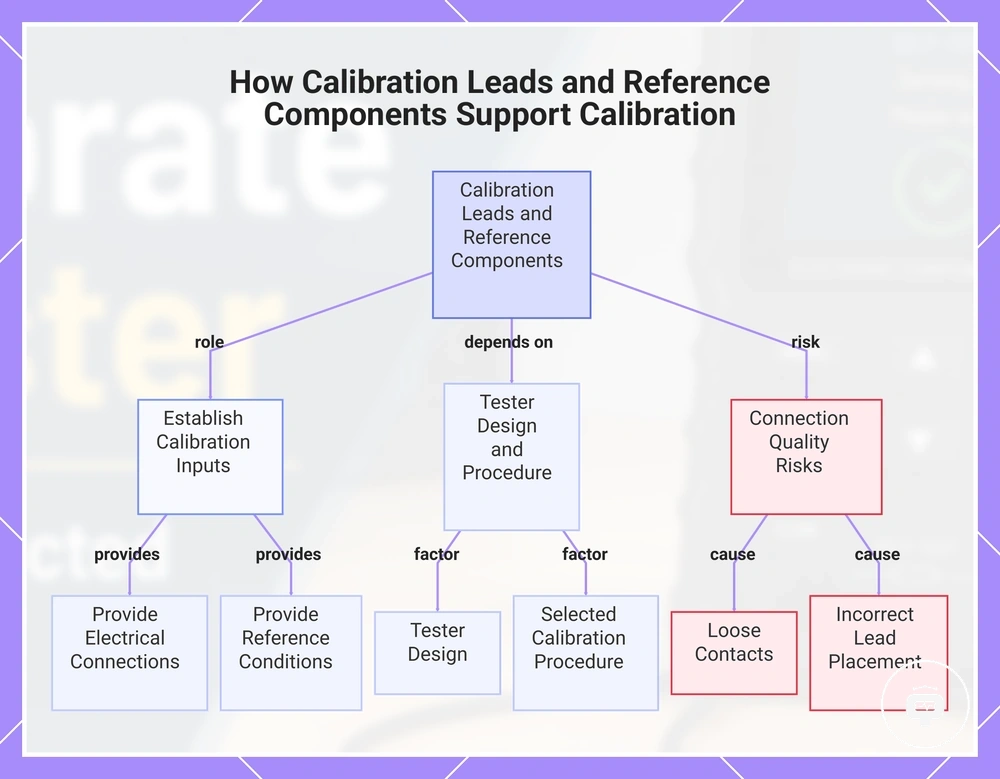
Calibration leads and a reference component support calibration by providing the electrical connections and reference conditions needed for the tester to perform its calibration procedure. Their role is to establish appropriate calibration inputs so the tester can evaluate or adjust its measurement behaviour. The required calibration leads, reference component, or reference arrangement depend on the tester design and the selected calibration procedure rather than a universal configuration.
Connection quality can influence calibration results because loose contacts, incorrect lead placement, or an unsuitable reference component may affect the calibration process. When the required calibration leads and reference component are connected according to the tester's calibration procedure, the resulting calibration status may better reflect the intended reference conditions. Even after calibration is completed successfully, measurement behaviour can still depend on the tester design, connection quality, and the reference conditions used during calibration.
This chart shows the role of calibration leads and reference components, their dependency on tester design and procedure, and the connection quality risks that affect calibration results.
Calibration Errors and Electronic Component Tester Not Calibrating
When an electronic component tester does not calibrate or reports a calibration error, the cause is often related to setup conditions, calibration configuration, or tester-specific limitations rather than a single universal fault. Identifying the symptom first helps narrow the possible cause before repeating the calibration procedure.
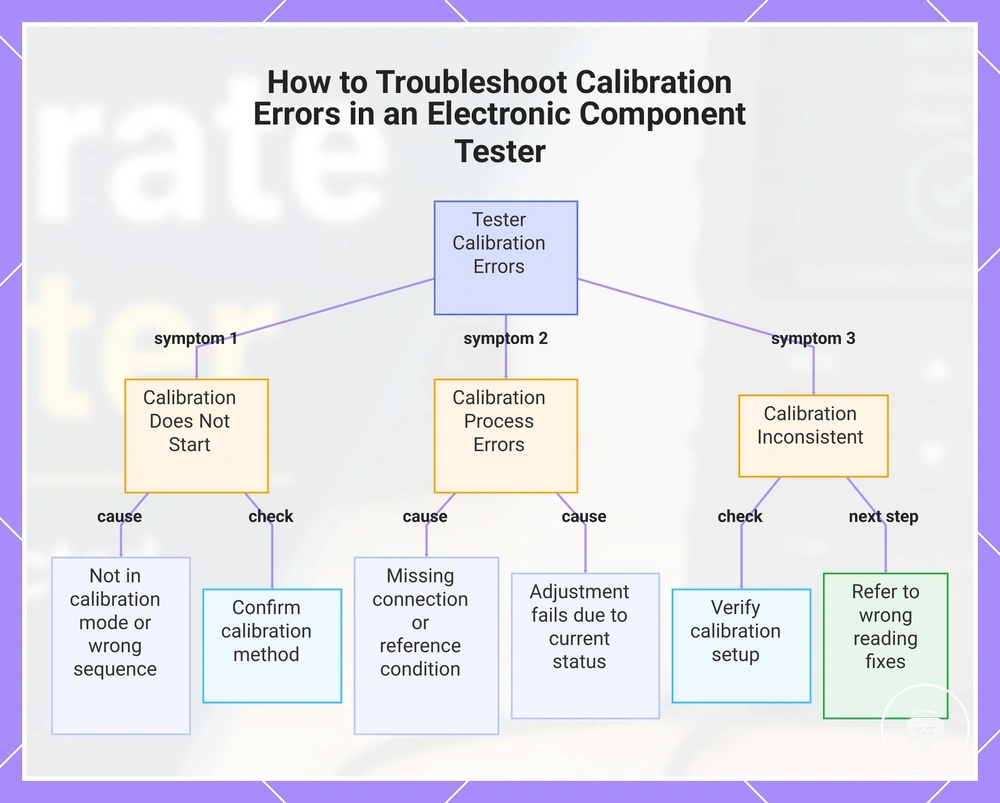
Use the following checklist to match the observed calibration problem with a likely cause and an appropriate check.
- Calibration does not start: The tester may not be in calibration mode, or the required sequence may not have been followed for that model. Confirm the appropriate calibration method before restarting the process.
- Calibration does not complete: A required connection or reference condition may be missing or incorrect. Verify that the calibration connections and reference inputs match the tester's procedure.
- Adjustment fails or reports an error: The adjustment stage may depend on the tester's current calibration status or operating conditions. Repeat calibration only after the required conditions have been satisfied.
- Calibration completes but results remain inconsistent: Measurement behaviour may still depend on connection quality, tester condition, or the reference conditions used during calibration. Verify the calibration setup before investigating broader measurement issues.
Some calibration failures may require further checks because calibration functions, reference requirements, and adjustment methods vary between tester designs. If calibration completes but measurement problems continue, refer to wrong reading fixes for broader diagnostic guidance.
This chart helps identify the likely cause of a calibration error by matching the observed symptom with the appropriate check.
Resetting Calibration Settings and Rechecking Tester Conditions
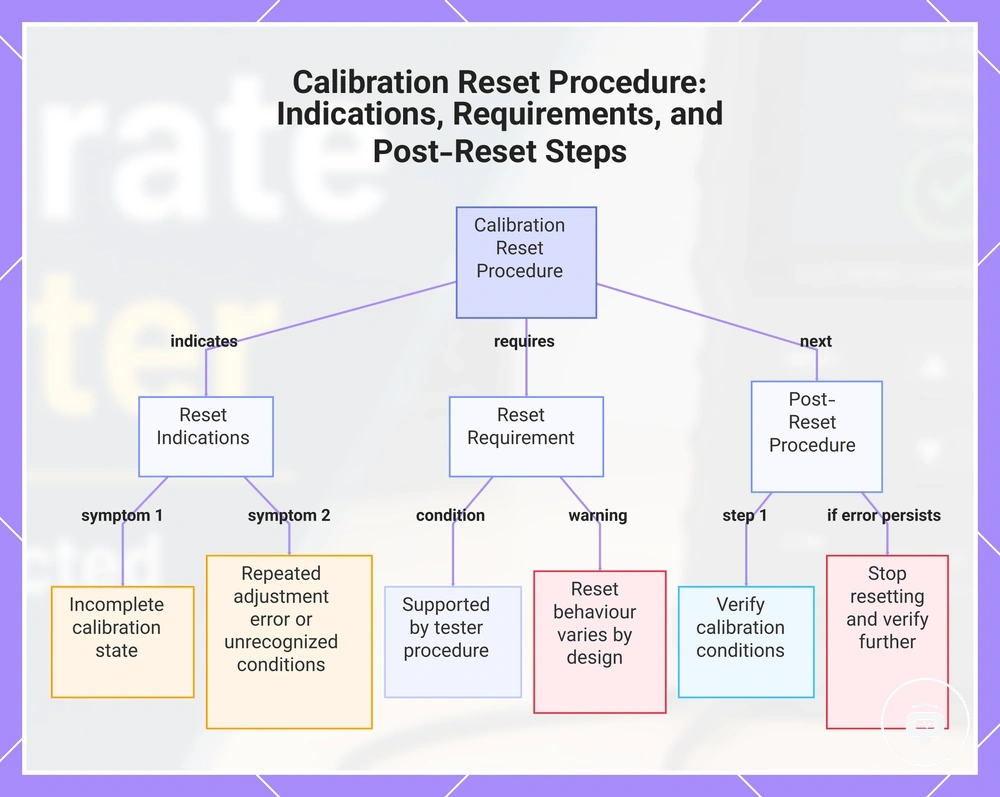
Resetting calibration settings may help when an electronic component tester remains in an incomplete calibration state, repeatedly reports an adjustment error, or does not recognise the required calibration conditions. A reset should only be performed when it is supported by the tester-specific procedure, because reset behaviour and stored calibration settings can vary by design. Before repeating calibration, confirm that the tester has returned to the intended calibration state instead of assuming the reset resolved the problem.
Verification should focus on the calibration settings, connection status, reference inputs, power condition, and other operating conditions required by the tester. If these conditions match the applicable calibration procedure, repeat the calibration and check whether the calibration status changes or the same error remains. If the problem persists, avoid repeated resets and treat the result as a tester-specific calibration condition that may require additional procedure-based verification rather than general device repair.
This chart shows the indications for resetting calibration settings, the requirement for tester-specific support, and the steps to follow after a reset, including how to handle persistent errors.