Raspberry Pi Accessory Care and Storage
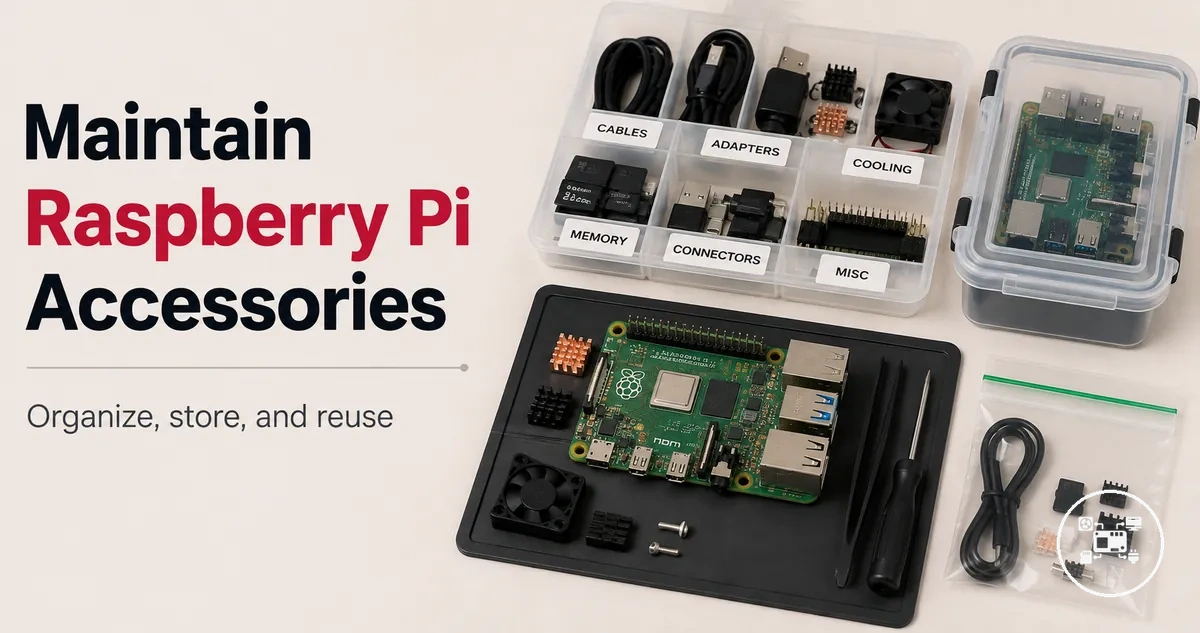
Raspberry Pi accessories require routine maintenance and organization through inspection, careful handling, dust removal, sorting, and suitable storage so they remain ready for reliable reuse. Raspberry Pi accessory care includes keeping cables, cases, cooling parts, adapters, connectors, and small parts clean, complete, and correctly organised according to their condition, model fit, and intended usage environment. Raspberry Pi Ltd. recommends handling Raspberry Pi boards and connected accessories carefully to avoid physical damage and electrostatic discharge, making routine care an important part of preserving reuse readiness rather than improving performance.
Raspberry Pi accessories require routine maintenance and organization through inspection, careful handling, dust removal, sorting, and suitable storage so they remain ready for reliable reuse.
After a Raspberry Pi project has been stored for weeks or months, dust can accumulate around ports, cases, and cooling parts, while unlabeled cables or loose screws can slow the next installation. A practical storage routine groups Raspberry Pi accessories into labelled compartments for cables, adapters, cooling parts, cases, and small parts so each item can be inspected before reuse instead of searched for during assembly. For example, storing four HDMI adapters, two USB power supplies, one cooling fan, and a labelled container holding eight screws and four spacers allows missing or damaged components to be identified immediately before the next setup, reducing preparation time through simple organization rather than additional troubleshooting.
After a Raspberry Pi project has been stored for weeks or months, dust can accumulate around ports, cases, and cooling parts, while unlabeled cables or loose screws can slow the next installation.
Poor organization increases the likelihood of misplaced accessories, contaminated connectors, blocked airflow around cooling parts, and overlooked physical wear before a Raspberry Pi system is reused. Routine maintenance addresses these risks through inspection, cleaning, organization, dust control, and suitable storage conditions while recognising that long-term reliability still depends on the accessory type, board model, physical condition, and storage environment. Routine accessory care is intended to preserve reusable hardware; diagnosing electrical faults, replacing damaged components, or repairing failed accessories belongs to repair and troubleshooting rather than routine maintenance.
Table of Contents
What Raspberry Pi Accessory Care Should Cover
Raspberry Pi accessory care covers cleaning, inspection, sorting, storage, and safe reuse of accessories used around the board. The maintenance scope includes checking cable condition, port cleanliness, case dust exposure, cooling obstruction, and small-part completeness so accessories remain organised and suitable for safe reuse. These routine checks help reduce avoidable setup delays by identifying contamination, physical wear, or missing parts before the next project.
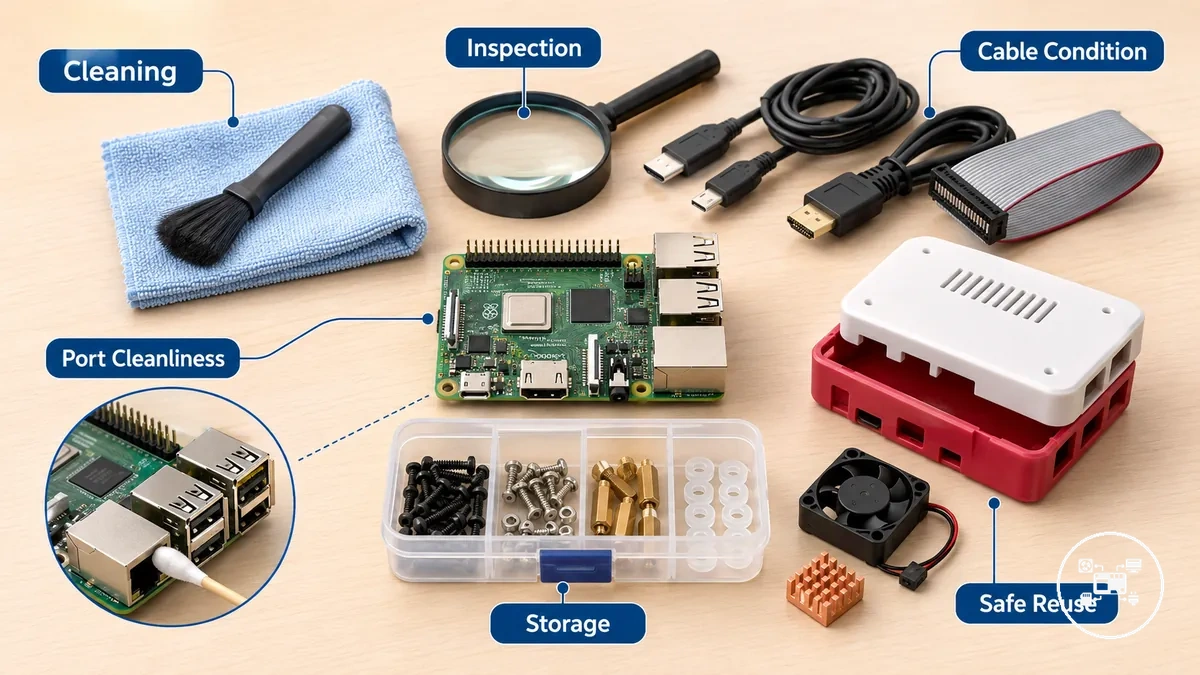
Raspberry Pi accessory care is limited to the routine condition of accessories rather than board repair. For Raspberry Pi accessories, cable condition means checking for intact insulation and undamaged connectors, port cleanliness means removing visible dust or debris, case care focuses on dust exposure around vents and openings, cooling parts are checked for physical airflow obstruction, and small-part completeness confirms that screws, spacers, adapters, and similar items remain together. The exact care scope depends on the accessory type and its physical condition.
The exact care scope depends on the accessory type and its physical condition.
Routine care helps prevent misplaced accessories, blocked airflow, contaminated connectors, and overlooked physical damage before reuse because these conditions can delay or complicate the next installation. Raspberry Pi accessory care stops at cleaning, inspection, sorting, and storage, while electrical fault diagnosis, hardware testing, and component replacement belong to troubleshooting rather than routine maintenance.
Routine care helps prevent misplaced accessories, blocked airflow, contaminated connectors, and overlooked physical damage before reuse because these conditions can delay or complicate the next installation.
The following Raspberry Pi accessory care checklist organises the routine maintenance scope into practical care dimensions and expected outcomes:
- Cleaning: Remove visible dust from cables, adapters, cases, and accessible surfaces to reduce contamination before safe reuse.
- Inspection: Check cable condition, connector integrity, case damage, and accessory wear so damaged items can be separated from reusable ones.
- Sorting: Group cables, adapters, storage media, and accessories by connector type or function to improve setup readiness.
- Storage: Keep accessories in labelled containers or compartments to reduce loss and simplify future identification.
- Cooling parts: Inspect fans, heatsinks, and case vents for cooling obstruction so airflow paths remain physically clear.
- Small parts: Store screws, spacers, standoffs, and mounting hardware together to maintain small-part completeness before the next Raspberry Pi project.
Accessory Inspection and Reuse Readiness
Accessory inspection confirms whether Raspberry Pi accessories are ready for reuse by checking that they are clean, complete, undamaged, and appropriate for the next setup. Reuse readiness is determined through visible condition checks rather than electrical testing, so the decision depends on the accessory's physical condition, model fit, and intended use. An accessory is considered ready for reuse only after these visible criteria have been satisfied.
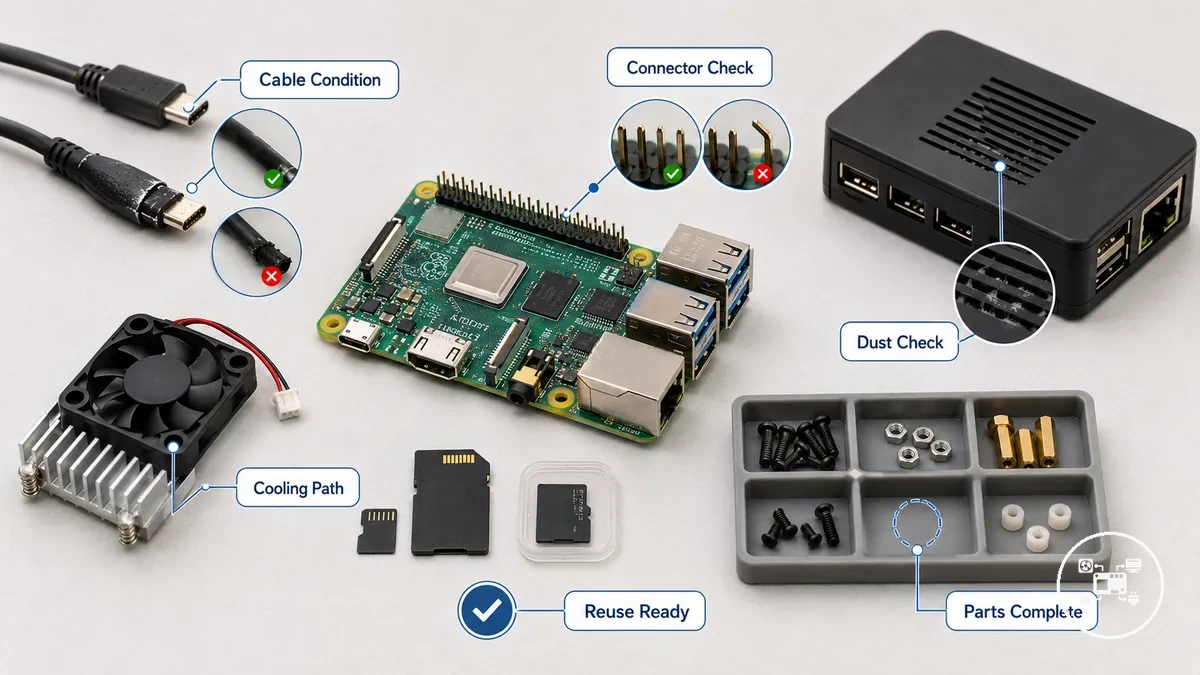
Inspection helps identify problems before they interrupt the next Raspberry Pi project. Check cables and adapters for worn insulation, loose connectors, bent pins, or port strain; inspect cases and cooling parts for dust accumulation or blocked airflow; and confirm that screws, spacers, and storage media remain present and correctly labelled. For example, if a project originally uses four case screws and one mounting screw is missing during inspection, the accessory set is incomplete and should be reorganised before reuse. These visible condition checks reduce the likelihood of setup delays caused by missing parts, contamination, or overlooked wear.
Inspection helps identify problems before they interrupt the next Raspberry Pi project.
Before reconnecting power accessories, inspect plugs, connectors, and cables for contamination, loose fittings, or visible damage as part of maintaining power accessories. Likewise, a cooling fan with unobstructed blades, a heatsink securely attached, and a case with clear ventilation openings is generally a better candidate for reuse than one showing blocked airflow or loose mounting hardware. Inspection supports informed reuse decisions, but the final decision still depends on accessory condition, Raspberry Pi model compatibility, and the intended operating environment.
Before reconnecting power accessories, inspect plugs, connectors, and cables for contamination, loose fittings, or visible damage as part of maintaining power accessories .
Use the following Accessory Inspection and Reuse Readiness checklist to verify condition, completeness, and fit before the next Raspberry Pi setup:
- Cables: Reuse only when insulation is intact, connectors remain secure, and no visible cuts, crushing, or excessive wear are present.
- Adapters: Confirm that connector pins are straight, housings are undamaged, and plugs fit securely without looseness.
- Cases: Check for cracks, damaged mounting points, blocked ventilation openings, and accumulated dust before reuse.
- Power accessories: Inspect plugs, cable ends, and connectors for contamination, discoloration, or physical damage before reconnecting.
- Cooling parts: Verify that heatsinks remain firmly attached and fan blades rotate freely without dust buildup or physical obstruction.
- Screws and spacers: Count mounting hardware and confirm all required pieces remain together in labelled storage before assembly.
- Storage media: Check SD cards or other storage media for visible damage and ensure labels still identify the correct Raspberry Pi system.
Safe Cleaning Tools and Handling
Safe cleaning tools and handling for Raspberry Pi accessories use dry, non-abrasive methods performed after power disconnection from any powered accessory. Appropriate tools include a soft brush, a dry microfiber cloth, gentle air movement for loose dust, and a dust cover for storage, while the correct cleaning method depends on the accessory material, dust level, and electrical sensitivity. Safe cleaning removes surface dust and debris but does not repair damaged electronics.
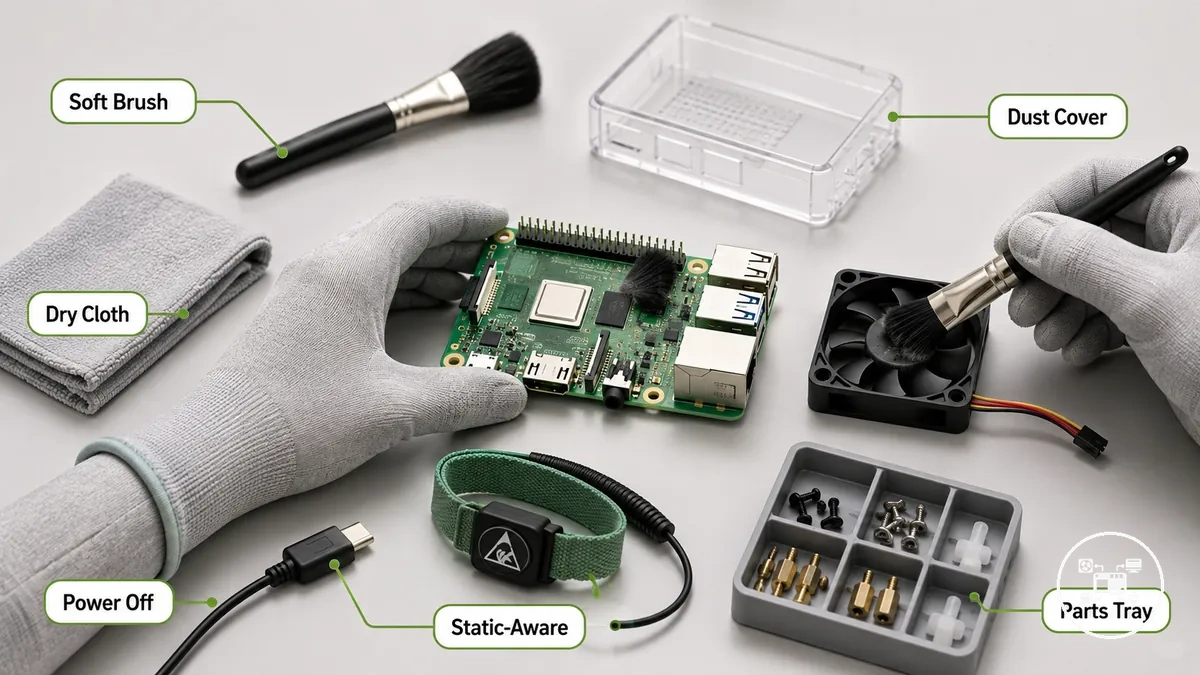
Dust around connectors, cooling fans, or ventilation openings can interfere with inspection and reduce airflow through cooling components, so cleaning tools should match the accessory rather than the contamination. Raspberry Pi documentation advises disconnecting power before handling boards or accessories, and the U.S. National Institute for Occupational Safety and Health (NIOSH) recommends using the least aggressive cleaning method that effectively removes dust before considering stronger measures. For example, a Raspberry Pi accessory kit containing four cables, one cooling fan, one acrylic case, and two adapters can be cleaned by brushing dust from the fan, wiping the case and cable jackets with a dry microfiber cloth, and placing all cleaned parts under a dust cover with the power supply disconnected before storage. Dry, gentle, power-disconnected handling remains the default approach.
Dry, gentle, power-disconnected handling remains the default approach.
If powered accessories, exposed connectors, fan blades, acrylic cases, or small loose parts require cleaning, select the tool according to the accessory condition instead of using one method for every surface. Use gentle air movement only for loose dust around fan blades or heatsinks, use a dry cloth on acrylic cases only after loose particles have been removed to reduce surface marks, and keep screws or spacers in a parts tray during cleaning to prevent loss. Avoid applying liquids directly to sensitive parts or exposed connectors, and keep powered accessories disconnected until cleaning is complete.
Avoid applying liquids directly to sensitive parts or exposed connectors, and keep powered accessories disconnected until cleaning is complete.
Use this Safe Cleaning Tools and Handling checklist to verify appropriate tools and handling habits before cleaning Raspberry Pi accessories:
- Soft brush: Removes loose dust from connectors, vents, and cooling parts while reducing the risk of scratching delicate surfaces.
- Dry microfiber cloth: Cleans cable jackets and case surfaces without introducing moisture to sensitive parts.
- Gentle air movement: Clears light dust from fan blades and heatsink fins while avoiding unnecessary force that can displace small components.
- Power disconnection: Disconnect powered accessories before handling to avoid cleaning energized electrical components.
- Static-aware handling: Hold accessories by their edges and minimise contact with exposed connectors to reduce handling-related electrical risk.
- Dust cover and parts tray: Protect cleaned accessories from fresh dust and keep screws, spacers, and other small loose parts together to prevent loss.
Dust Control for Cases, Ports, Boards, and Cooling Parts
Dust control for Raspberry Pi cases, ports, boards, and cooling parts focuses on removing dust before it obstructs airflow, restricts port access, or contaminates exposed surfaces. Raspberry Pi documentation advises keeping connectors clean and handling boards carefully to reduce contamination and physical damage, making routine dust removal part of preventive maintenance rather than hardware repair. Dust risk differs by component because exposed vents, ports, and cooling parts collect airborne particles more readily than protected or sealed accessories. Effective dust control therefore prioritises clear airflow paths and reliable port access instead of claiming guaranteed temperature improvements.
These maintenance priorities differ between open cases, enclosed cases, fan-cooled setups, and stored accessory kits.
For an open-case Raspberry Pi, board surfaces, ports, and fan blades are exposed continuously to airborne dust, while an enclosed case provides partial protection but still allows dust to enter through ventilation openings. In a fan-cooled setup, dust collecting between fan blades or heatsink fins can restrict airflow if the buildup becomes significant, whereas stored accessory kits benefit from dust covers or sealed containers that reduce storage exposure. For example, an accessory kit containing one Raspberry Pi board, one cooling fan, one heatsink, four cables, and one protective case should have each exposed part inspected and cleaned before reuse so airflow paths and connector access remain unobstructed. These maintenance priorities differ between open cases, enclosed cases, fan-cooled setups, and stored accessory kits.
Cleaning priority should begin with components where dust directly affects airflow or connector access, followed by less exposed surfaces.
Cleaning priority should begin with components where dust directly affects airflow or connector access, followed by less exposed surfaces. When cleaning cooling accessories, inspect fan blades and heatsinks for visible dust obstruction before cleaning, but avoid diagnosing overheating unless airflow restriction or another observable symptom is present.
Dust Control for Cases, Ports, Boards, and Cooling Parts is easier to apply when maintenance follows the exposure level of each component instead of using the same routine for every accessory.
Dust Control for Cases, Ports, Boards, and Cooling Parts is easier to apply when maintenance follows the exposure level of each component instead of using the same routine for every accessory. As an example of maintaining Raspberry Pi cases, keeping case vents and port openings free from dust helps preserve airflow paths and physical connector access during normal operation and storage.
| Entity / Part | Dust Exposure Condition | Maintenance Action | Risk Reduced |
|---|---|---|---|
| Case vents | Open vents during operation | Remove visible dust from ventilation openings | Airflow obstruction |
| Ports | Exposed connectors | Inspect and remove loose dust before connecting accessories | Restricted port access and poor connector contact |
| Board surface | Open-board operation or extended storage exposure | Remove loose surface dust using an appropriate dry cleaning method | Surface contamination |
| Fan blades | Fan-cooled setup | Clean visible dust that obstructs blade movement or airflow | Reduced airflow through the cooling path |
| Heatsinks | Dust trapped between cooling fins | Remove loose dust from fin spaces | Cooling obstruction |
| Filters | Filtered enclosure | Inspect and clean or replace according to the filter design | Restricted intake airflow |
| Stored kits | Long-term storage exposure | Store in sealed containers or under dust covers | Dust accumulation before reuse |
Fan and Heatsink Cleaning
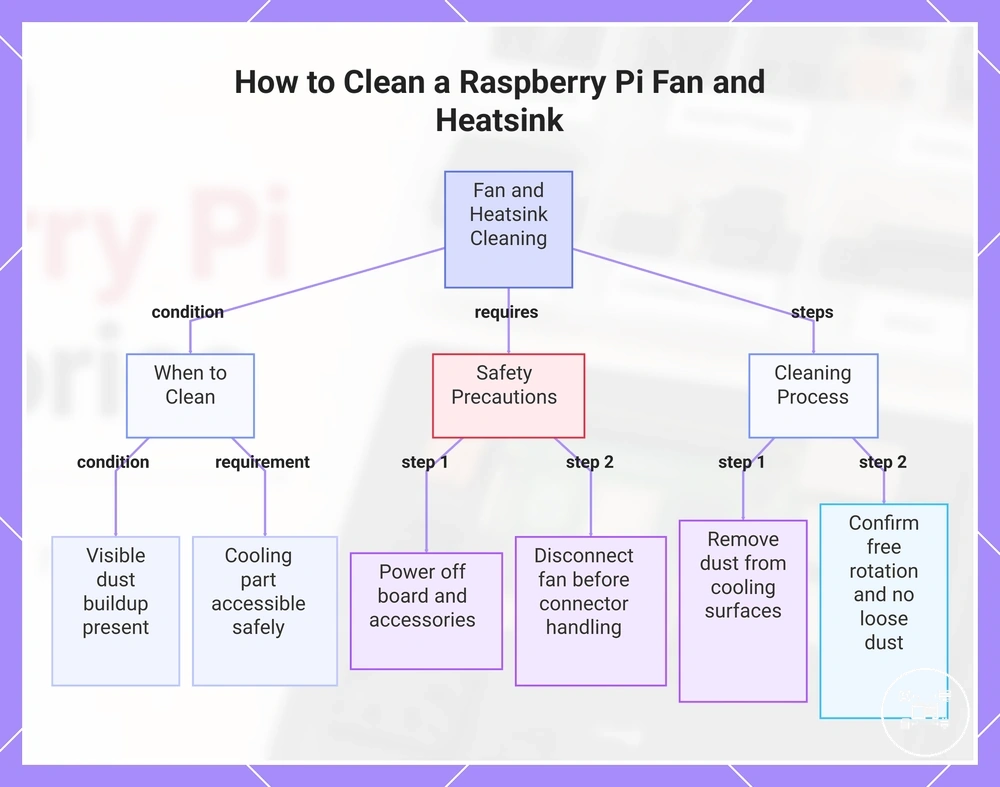
Fan cleaning and heatsink cleaning should be performed only when visible dust buildup is present and the cooling part can be accessed safely. According to Raspberry Pi documentation, boards and connected accessories should be powered off before handling to reduce the risk of damaging components or connectors. Cleaning removes dust from fan blades, heatsink fins, and vents to restore unobstructed airflow, but it should not be treated as a standalone solution for fan noise or overheating symptoms. :contentReference[oaicite:0]{index=0}
Fan cleaning and heatsink cleaning should be performed only when visible dust buildup is present and the cooling part can be accessed safely.
In a fan-cooled setup, inspect the cooling fan and heatsink before cleaning because exposed cooling parts accumulate dust more readily than enclosed components. For example, if visible dust blocks several heatsink fins or coats both sides of the fan blades, cleaning those surfaces before reuse helps restore the intended airflow path, while a powered fan should always be disconnected before its connector is handled to avoid unnecessary strain. :contentReference[oaicite:1]{index=1}
In a fan-cooled setup, inspect the cooling fan and heatsink before cleaning because exposed cooling parts accumulate dust more readily than enclosed components.
Follow these compact cleaning steps after confirming that the cooling parts are accessible:
- Fan blades: Remove visible dust with soft brushing so dust buildup does not obstruct blade movement or reduce airflow.
- Heatsink fins: Use gentle air movement or a soft brush to clear dust between heatsink fins without bending the metal fins.
- Vents: Clean dust from ventilation openings so blocked airflow does not restrict cooling around the fan and heatsink.
- Obstruction check: Confirm that fan blades rotate freely and that no loose dust remains around the heatsink fins or vents before reconnecting the powered fan.
This chart shows the conditions, safety precautions, and steps for cleaning the fan and heatsink on a Raspberry Pi.
Case Layers and Port Access Cleaning
Case Layers and Port Access Cleaning removes visible dust from case surfaces, seams, port openings, and removable layers so connectors remain accessible and case vents remain unobstructed. According to Raspberry Pi documentation, boards and accessories should be powered off before handling, and cleaning around connectors should be performed gently to avoid damaging ports or pushing debris further into the opening. Dust commonly accumulates around seams, ports, vents, and removable layers because these access points interrupt otherwise smooth case surfaces. :contentReference[oaicite:0]{index=0}
This illustrative inspection pattern helps reduce blocked port access and prevents small screws from being misplaced during routine cleaning.
A dry wipe cleans exposed case surfaces, but careful cleaning around port access points removes dust that remains inside seams, cable pass-through areas, and removable lids. For example, a Raspberry Pi case with 4 screw points, 2 removable lids, and 6 external port openings should have each access point inspected individually before storage or reuse so trapped dust can be removed without applying force inside the connectors. This illustrative inspection pattern helps reduce blocked port access and prevents small screws from being misplaced during routine cleaning. :contentReference[oaicite:1]{index=1}
A dry wipe cleans exposed case surfaces, but careful cleaning around port access points removes dust that remains inside seams, cable pass-through areas, and removable lids.
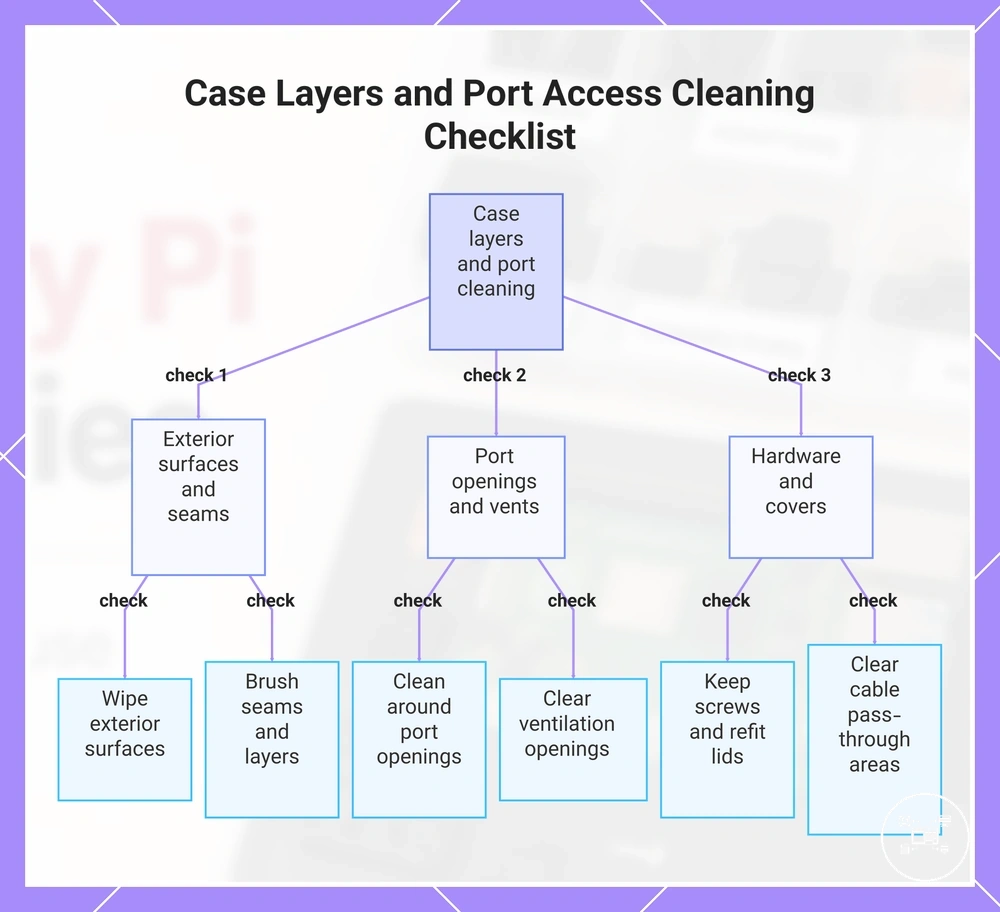
Use this Case Layers and Port Access Cleaning checklist to verify the most common dust collection points:
- Case surfaces: Wipe exterior case surfaces with a dry microfiber cloth to remove loose dust before it reaches openings.
- Seams and case layers: Brush dust from seams and removable layers where wiping alone cannot reach.
- Port openings: Clean around USB, HDMI, Ethernet, and power port openings carefully without forcing tools into the connectors.
- Case vents: Remove visible dust from ventilation openings so airflow paths remain physically unobstructed during operation.
- Screw points and removable lids: Keep screws together during cleaning and confirm removable lids are securely refitted after inspection.
- Cable pass-through areas and dust covers: Clear dust from cable pass-through openings and reinstall dust covers, where fitted, before storing the case.
This chart shows the key areas to clean and the recommended actions for removing dust from a Raspberry Pi case, ensuring ports remain accessible and vents unobstructed.
Cable and Adapter Organization
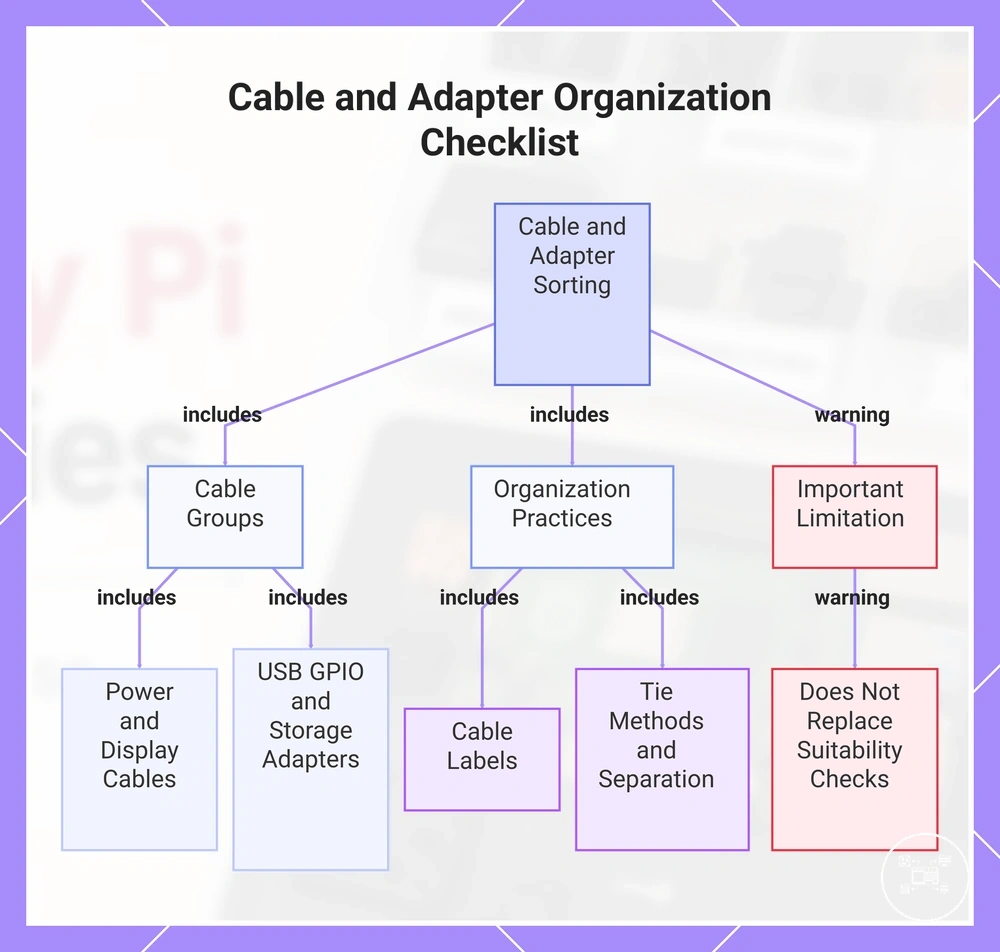
Cable organization reduces confusion, wrong-cable reuse, port strain, and missing-adapter delays by separating Raspberry Pi cables and adapters according to function, connector type, condition, and project frequency. Power leads, display cables, USB adapters, GPIO leads, and storage adapters should remain in distinct groups rather than one mixed container. Cable labels identify each group, while loose reusable tie methods limit tangling without forcing sharp bends near connector ends. This structure makes the intended use visible and reduces setup mistakes. :contentReference[oaicite:0]{index=0}
This structure makes the intended use visible and reduces setup mistakes.
When a project uses several cables with similar connector shapes, appearance alone does not identify power delivery, data capability, or the intended device. For example, suppose a storage box contains three USB-C leads: one labelled for power, one labelled for data, and one with an unknown purpose; separating the unidentified lead prevents wrong-cable reuse until its function and condition are checked. Display cables and storage adapters should follow the same rule, with each group divided by visible connector type and use case. This approach organises cables first by function and then by connector type. :contentReference[oaicite:1]{index=1}
This approach organises cables first by function and then by connector type.
The organising rule is to assign every cable or adapter to one visible use case, connector group, condition state, and frequency category. Frequently used accessories can remain in an accessible labelled section, while occasional or project-specific items should stay with the related project container. Cable organization supports identification and preparation, but it does not replace electrical suitability, physical condition, or setup checks. :contentReference[oaicite:2]{index=2}
The organising rule is to assign every cable or adapter to one visible use case, connector group, condition state, and frequency category.
Use this Cable and Adapter Organization checklist to group cables by use and connector while applying accessory setup practices that reduce avoidable setup mistakes:
- Power leads: Separate power leads by connector type and labelled purpose so visually similar charging or data cables are not selected without checking their intended use.
- Display cables: Group display cables by interface and connector form so full-size and smaller connector variants remain easy to distinguish.
- USB adapters: Store USB adapters by source connector, destination connector, and project use to reduce missing-adapter confusion.
- GPIO leads: Keep GPIO leads and jumper wires away from heavier cables so their small connectors remain visible and untangled.
- Storage adapters: Keep card readers and storage adapters with the storage workflow or project they support so they can be found before backup, imaging, or reuse.
- Cable labels: Mark each cable's function, project, or known limitation near the connector end so identification does not require uncoiling the cable.
- Tie methods and separation by use case: Use reusable ties without sharp bends, then separate frequent-use, occasional-use, and project-specific groups to reduce tangling and port strain.
This chart shows the main categories and practices for organizing Raspberry Pi cables and adapters to reduce setup mistakes.
Cable Identification and Separation
Cable Identification and Separation separates similar-looking Raspberry Pi accessory cables by using visible labels, cable length, connector type, and purpose-based grouping instead of appearance alone. Labels and separation prevent connector and purpose confusion during reuse, while any decision based on power-rating labels should be made only when both the cable label and the accessory requirement are verifiable. :contentReference[oaicite:0]{index=0}
- Cable length: Group short, medium, and long cables separately so cables with the same connector type are less likely to be confused during storage or retrieval.
- Connector type: Separate USB, HDMI, Ethernet, audio, and other connector types to prevent connecting the wrong cable to a Raspberry Pi accessory with a similar-looking plug.
- Power-rating labels: Keep cables with printed power-rating labels in their own group, and rely on those labels only when the connected accessory specifies a matching, verifiable requirement. :contentReference[oaicite:1]{index=1}
- Display use and storage use: Label display cables separately from storage-use accessories such as card readers or storage adapters so each cable purpose remains immediately identifiable.
- GPIO and jumper wires: Store GPIO leads and jumper wires in a dedicated labelled container to prevent small leads from being mixed with standard accessory cables.
Power, Display, GPIO, and Storage Cable Grouping
Power, Display, GPIO, and Storage Cable Grouping should separate each Raspberry Pi accessory cable by function and visible connector type rather than by appearance alone. The table below applies one condition check and one reuse outcome to every power cable, display cable, GPIO cable, storage cable, USB cable, and adapter cable. Grouping supports setup readiness, but it does not replace model-specific compatibility checks. :contentReference[oaicite:0]{index=0}
| Cable group | Main identifier | Condition check | Reuse note |
|---|---|---|---|
| Power cable | Power function, connector type, and any readable rating label | Confirm that the insulation and connector are undamaged and that any required rating can be verified | Keep in the power group; suitability remains conditional on the accessory requirement |
| Display cable | Display function and connector type | Check both connector ends and the cable jacket for visible damage | Store with display accessories to reduce port and purpose confusion |
| GPIO cable | GPIO header connector, jumper-wire form, or visible label | Confirm that the leads are complete, untangled, and clearly identified | Separate from heavier cables so small GPIO leads remain easy to locate |
| Storage cable | Storage function and data connector type | Inspect the connectors and confirm the cable remains assigned to its storage use | Keep with storage accessories to reduce reuse confusion |
| USB cable | USB function and connector type at both ends | Check the connector shells, cable jacket, and visible purpose label | Group by known use because similar-looking USB cables may serve different functions |
| Adapter cable | Source connector, destination connector, and supported accessory function | Verify that both ends are undamaged and that the adapter purpose is labelled | Store with the function it supports rather than with visually similar cables |
Small Parts and Accessory Storage Containers
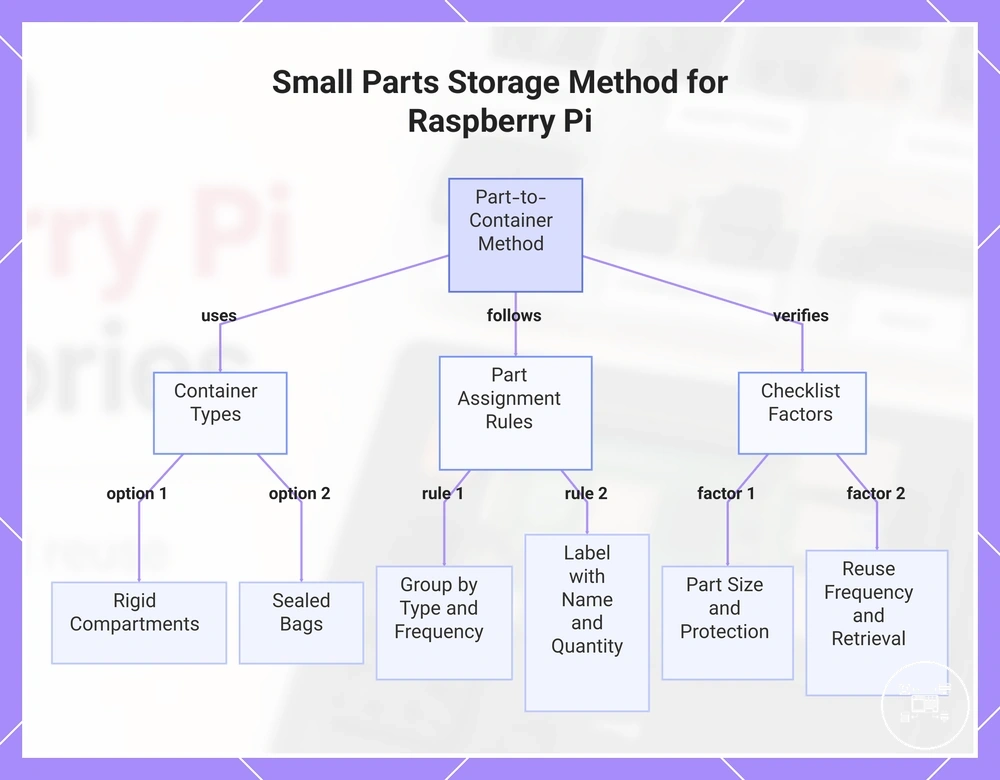
Accessory storage containers protect Raspberry Pi small parts from loss, mixing, and handling damage by assigning each part type to a labelled storage condition. Screws, spacers, standoffs, case parts, microSD cards, and adapters should remain separated rather than sharing one loose container. Compartments support quick retrieval for rigid hardware, while sealed bags keep matched sets together when separate compartments are unavailable. This part-to-container method lowers loss risk by giving every item an identifiable location. :contentReference[oaicite:0]{index=0}
This part-to-container method lowers loss risk by giving every item an identifiable location.
When a project is dismantled, frequently reused screws, adapters, and microSD cards need faster access than rarely used standoffs or spare case parts. For example, an illustrative kit containing four case screws, four spacers, one microSD card, and two adapters can use one labelled compartment for mounting hardware, one sealed bag for the microSD card, and one compartment for adapters; this keeps the twelve items from becoming a mixed group. The following Small Parts and Accessory Storage Containers checklist verifies part size, reuse frequency, protection, and retrieval. Frequently reused parts should remain in accessible labelled compartments, while rarely used spares can occupy a separate sealed or covered storage area.
- Screws: Store screws in a labelled compartment sized to prevent them from entering adjacent sections, reducing mixing and loss risk.
- Spacers and standoffs: Keep matched spacers and standoffs in separate compartments or sealed bags so complete sets remain identifiable.
- Case parts: Place removable panels, feet, clips, and related hardware together in a container that limits bending, surface pressure, and separation from their mounting parts.
- microSD cards: Use a closed holder or labelled sealed bag that limits loose movement and separates each card by project or stored image.
- Adapters: Group adapters by accessory function and connector type so visually similar items are not mixed during retrieval.
- Labels: Mark each compartment or sealed bag with the part name, project, and known quantity so missing items are visible before reuse.
- Reuse frequency: Keep frequently reused parts in accessible compartments and place rarely used spares in a separate covered section to reduce unnecessary handling.
The storage rule is to match each part with a container that limits movement, preserves identification, and supports its expected retrieval frequency. As part of maintaining Raspberry Pi cases, store case parts, screws, spacers, and standoffs together but in labelled compartments that prevent different mounting sets from mixing.
Clear labels improve identification, although long-term protection still depends on part sensitivity and the storage environment.
Container selection should balance compartment size, closure, visibility, and access frequency rather than treating the container as the main subject. Rigid compartments improve separation and retrieval, while sealed bags use less space and keep matched sets together but provide less protection from crushing or bending. Clear labels improve identification, although long-term protection still depends on part sensitivity and the storage environment. The practical trade-off is between faster access, stronger physical separation, storage space, and the amount of handling required.
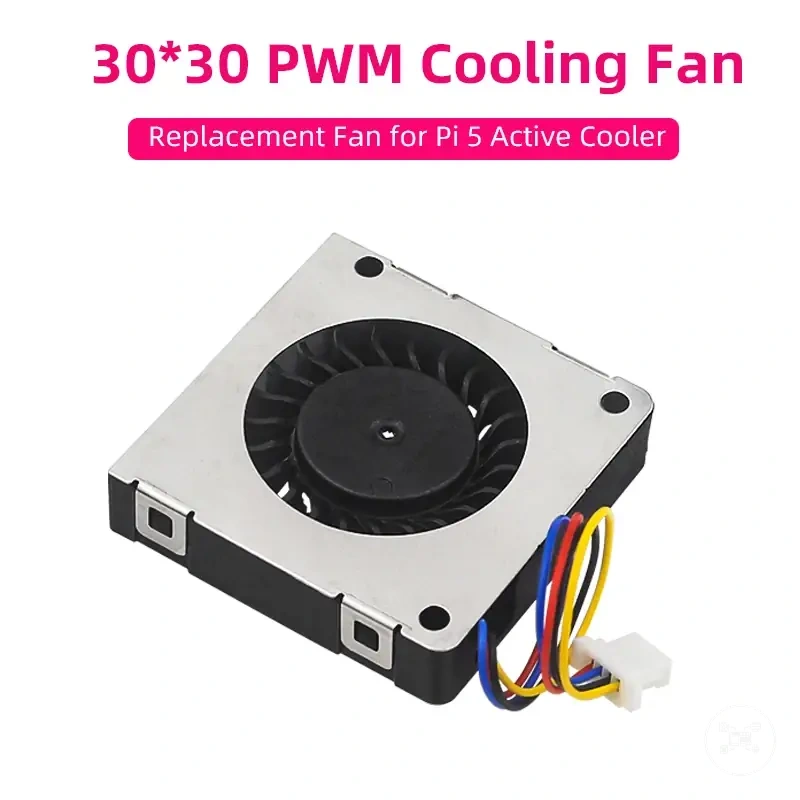
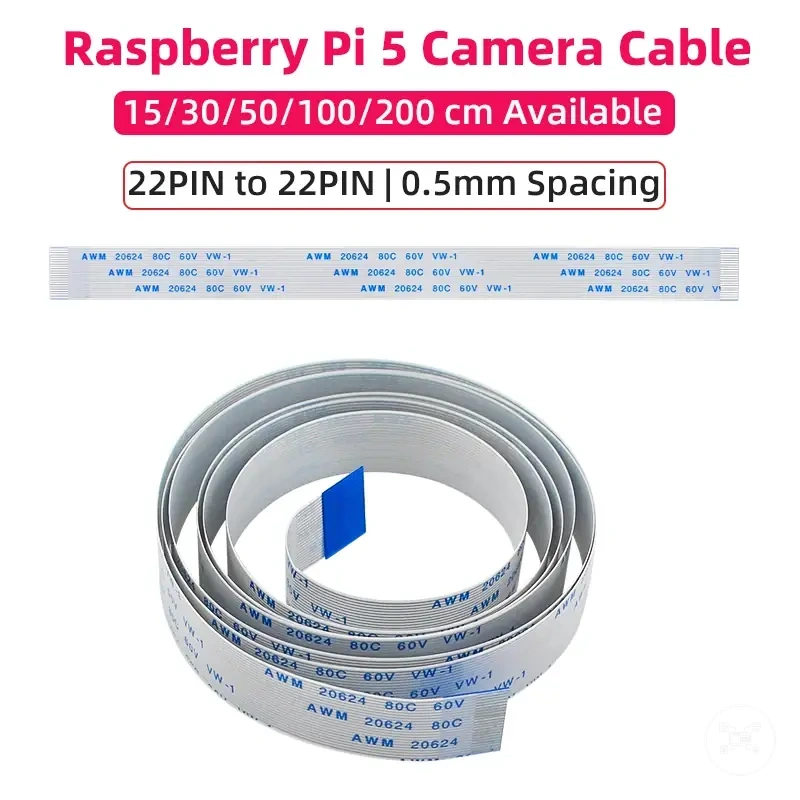
Here are product examples that may make comparison easier.
Here are product examples that may make comparison easier. Before buying, always review the compatibility criteria, essential features, and product details.
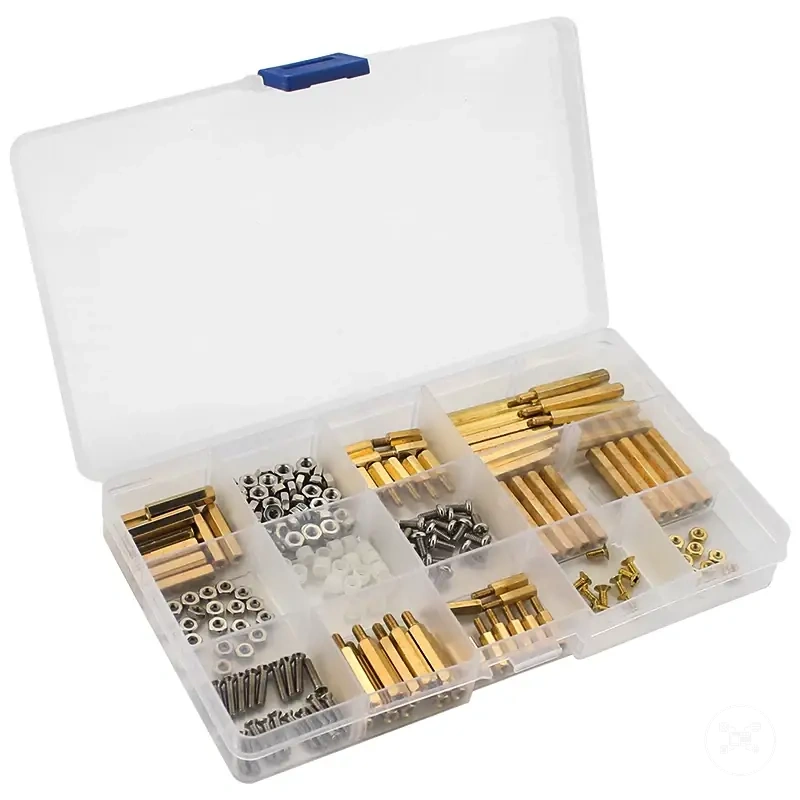
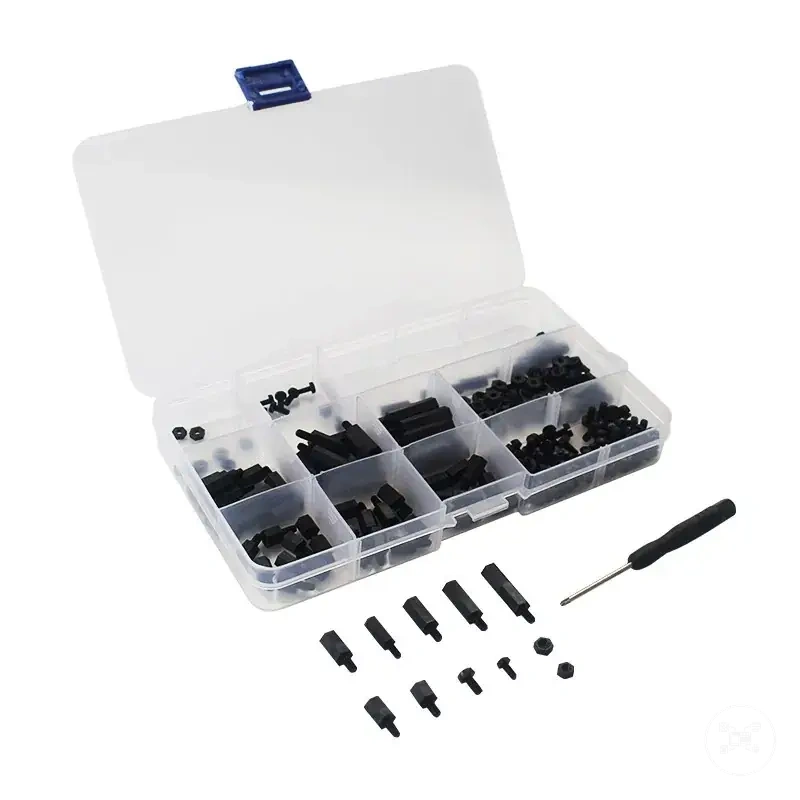
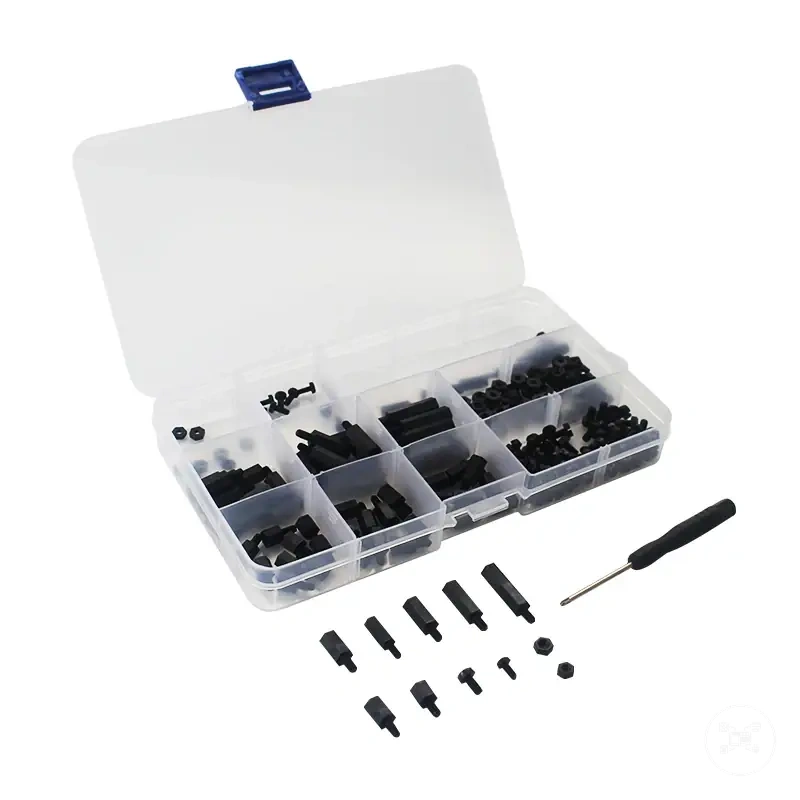
This chart shows the part-to-container storage method, including container types, assignment rules, and key checklist factors for organizing Raspberry Pi small parts.
Screws, Spacers, MicroSD Cards, and Support Parts
When a Raspberry Pi case, board, or adapter is reused, small support parts must remain separated and identifiable so the original assembly can be reconstructed without mixing unrelated hardware. Screws, spacers, standoffs, microSD cards, jumper caps, and adapters should carry labels that record their source, purpose, quantity, or visible condition. Screws, Spacers, MicroSD Cards, and Support Parts therefore need clear identity cues to remain available for later reuse. :contentReference[oaicite:0]{index=0}
- Screws: Separate screws by the case or accessory they came from, and label the set by source and known quantity so similar hardware is not mixed.
- Spacers and standoffs: Keep matched spacers and standoffs together with a case, board, or mounting-purpose label because later reuse remains conditional on the original assembly context.
- microSD cards: Label each microSD card by project, stored image, or intended device so identification does not depend on appearance alone.
- Jumper caps: Store jumper caps in a labelled bag or parts tray so these small support parts remain visible and separate from screws, leads, or loose adapters.
- Adapters: Identify adapters by connector direction and accessory purpose, then isolate any item with an uncertain identity until its intended use is confirmed.
- Labels: Record the part name, source project, known quantity, and any visible condition issue so support parts can be checked before reuse without assuming fit or suitability.
Storage Boxes, Bags, and Labelled Compartments
Storage Boxes, Bags, and Labelled Compartments should be selected according to the Raspberry Pi accessory part, handling frequency, and sensitivity to dust, static, crushing, or mixing. The comparison below distinguishes each storage format by its practical outcome and trade-off. Visibility, protection, portability, and sorting precision are the local selection criteria. :contentReference[oaicite:0]{index=0}
| Storage format | Best local use | Trade-off |
|---|---|---|
| Rigid boxes | Store screws, spacers, standoffs, and other small hardware where resistance to crushing and part mixing is required. | Rigid walls improve physical separation, but the box occupies more storage space than a flat bag. |
| Zip bags | Keep matched small parts portable and identifiable when each bag carries a clear part or project label. | Zip bags use little space, but loose contents are harder to sort and receive limited protection from pressure or bending. |
| Labelled trays | Keep frequently reused parts visible and accessible during maintenance or reassembly. | Open visibility supports quick retrieval, but exposed trays require a cover when dust protection is needed. |
| Divided compartments | Separate screws, jumper caps, microSD cards, and adapters into distinct sections for precise sorting. | Compartment separation reduces mixing, but fixed section sizes may not accept larger or irregular accessories. |
| Anti-static sleeves | Hold electrostatic-sensitive boards or electronic parts when the component requires static-aware storage. | Anti-static sleeves address electrostatic exposure for suitable parts, but they do not organise multiple hardware groups without additional labels or compartments. |
| Dust covers | Limit dust exposure around stored Raspberry Pi accessories, trays, or open containers between periods of reuse. | Dust covers reduce surface exposure, but they do not separate, label, or identify individual small parts. |
Storage Conditions That Protect Accessory Reliability
Storage conditions affect Raspberry Pi accessory reliability by controlling exposure to humidity, dust, heat, cable stress, connector pressure, and part mixing. Covered storage, part separation, and labelled access reduce avoidable risks before the next setup. These conditions support future usability without guaranteeing lifespan because outcomes also depend on material, use history, and environment. :contentReference[oaicite:0]{index=0}
The main conditions requiring control are moisture, dust, heat, and cable stress.
Poor storage can expose cables, adapters, boards, cooling parts, and small hardware to contamination or physical strain. Humidity can affect exposed metal contacts, dust can collect around ports and vents, heat can accelerate material ageing, and tight cable bends can stress insulation or connector joints. Separating parts and removing pressure from cables and connectors reduces these avoidable storage risks. The main conditions requiring control are moisture, dust, heat, and cable stress.
Separating parts and removing pressure from cables and connectors reduces these avoidable storage risks.
Storage Conditions That Protect Accessory Reliability can be assessed by linking each condition to the affected part, the resulting risk, and a prevention cue. The table applies this condition-to-risk-to-prevention logic without treating any storage method as a guarantee of accessory life.
| Storage condition | Affected accessory or part | Risk | Prevention cue |
|---|---|---|---|
| Humidity or moisture exposure | Connectors, adapters, screws, and exposed metal parts | Condensation, contamination, or corrosion can reduce future usability | Use dry, covered storage and keep accessories away from damp locations |
| Dust exposure | Ports, fans, heatsinks, cases, and cable ends | Dust can obstruct airflow, hide labels, or contaminate connector openings | Use covered storage and inspect exposed parts before reuse |
| Temperature and heat exposure | Cable insulation, plastic cases, adhesives, batteries, and storage media | Extended heat exposure can deform materials or accelerate ageing | Store accessories away from direct sunlight, heaters, and enclosed hot spaces |
| Cable bending | Power, display, USB, and adapter cables | Sharp bends create cable stress near insulation and connector joints | Use loose coils and avoid tight folds near either connector end |
| Connector pressure | Plugs, sockets, adapters, and cable ends | Compression or side loading can bend, loosen, or crack connector parts | Store connector ends without stacked weight or forced positioning |
| Static-sensitive parts | Boards, modules, and exposed electronic components | Electrostatic discharge can damage sensitive circuitry during handling or storage | Use suitable anti-static protection when the component requires static-aware storage |
| Covered storage | Accessory kits, open trays, and infrequently used parts | Uncovered storage increases dust exposure and accidental handling | Use a lid, dust cover, or closed container suited to the stored parts |
| Labelled access and part separation | Cables, adapters, microSD cards, screws, and support parts | Poor identification increases mixing, retrieval errors, and unsuitable reuse | Label each group by part type, project, purpose, quantity, or known condition |
The table shows that reliable storage requires control of both environmental exposure and physical handling. Covered storage limits dust and accidental contact, while loose cable routing reduces bending and connector pressure. Part separation and labelled access improve retrieval by keeping purpose and condition visible. These measures reduce avoidable risk, but their effectiveness remains conditional on accessory material, prior wear, and the storage environment.
Part separation and labelled access improve retrieval by keeping purpose and condition visible.
A practical storage decision should identify the accessory, its main sensitivity, and the condition most likely to affect later reuse. Select a storage method that limits that condition while preserving part separation and labelled access. This decision logic supports setup readiness and future usability without implying permanent protection or an exact lifetime.
Before buying, always review the compatibility criteria, essential features, and product details.
Here are product examples that may make comparison easier. Before buying, always review the compatibility criteria, essential features, and product details.
Maintenance Habits That Prevent Accessory Problems
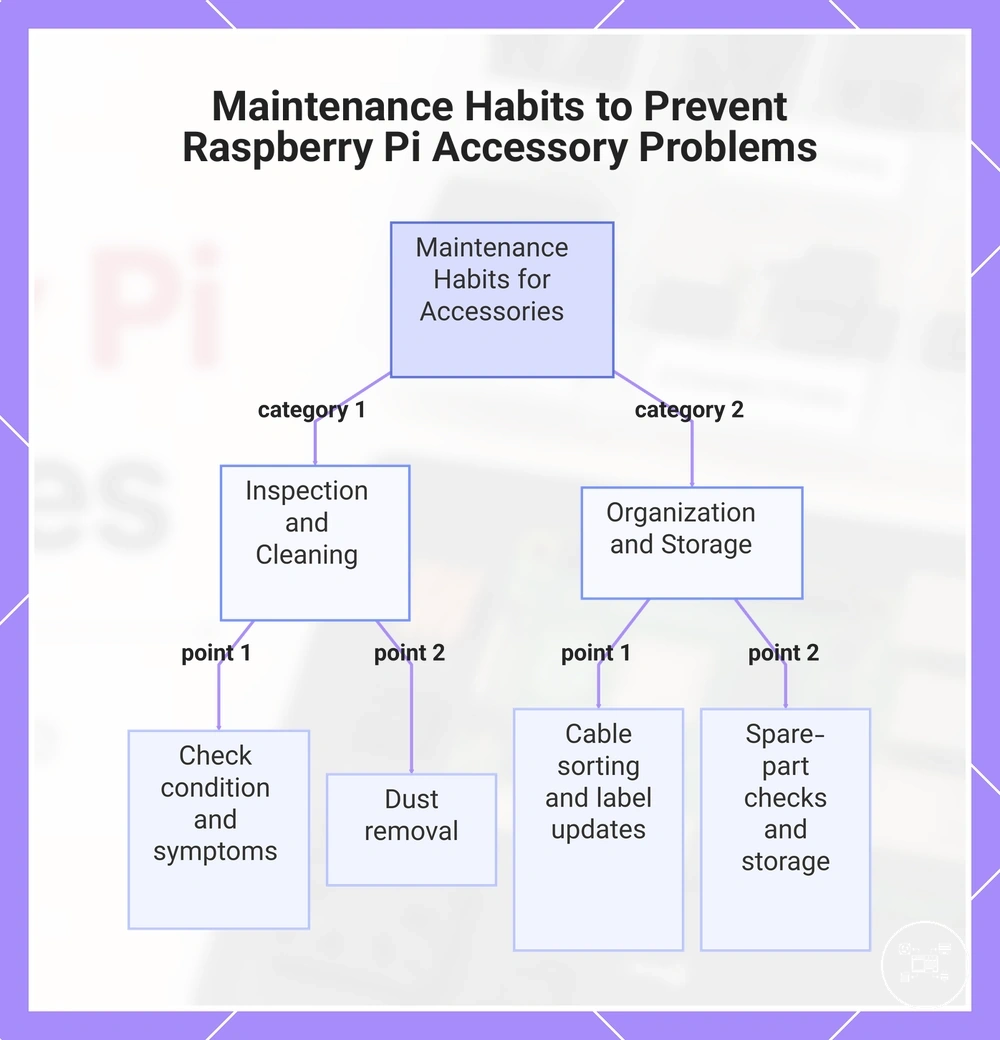
Maintenance habits reduce avoidable Raspberry Pi accessory problems by combining periodic inspection, dust removal, cable sorting, label updates, spare-part checks, return-to-storage routines, and symptom awareness. These recurring actions connect care, storage, and setup readiness by identifying missing, mixed, obstructed, or visibly worn accessories before reuse. They reduce avoidable setup failures without implying that routine maintenance prevents every hardware fault. :contentReference[oaicite:0]{index=0}
They reduce avoidable setup failures without implying that routine maintenance prevents every hardware fault.
Accessories used often should be checked before and after each project because repeated handling increases the chance of misplaced parts, damaged labels, or cable confusion. Accessories stored long term need inspection before reuse for dust, missing support parts, and changed identification, while accessories moved between projects should return to their assigned storage group after each setup. For example, an illustrative kit with one power supply, one display cable, one microSD card, and four case screws has seven items to account for before storage, making a return check more reliable than leaving parts across separate work areas.
Maintenance Habits That Prevent Accessory Problems work best as a repeatable prevention routine rather than a diagnosis process.
Maintenance Habits That Prevent Accessory Problems work best as a repeatable prevention routine rather than a diagnosis process. The checklist below pairs each habit with the risk it reduces and keeps the boundary clear between routine care and faults that still require troubleshooting.
- Periodic inspection: Check visible condition, connector stability, and part completeness to reduce unexpected setup interruptions.
- Dust removal: Clear visible dust from ports, vents, and cooling parts to reduce connector contamination and airflow obstruction.
- Cable sorting: Return cables to labelled function groups to reduce wrong-cable reuse and setup confusion.
- Label updates: Replace faded, missing, or inaccurate labels so adapters, cables, storage media, and support parts remain identifiable.
- Spare-part checks: Confirm that screws, spacers, standoffs, and adapters remain with the related accessory set to reduce incomplete reuse.
- Return-to-storage routines: Put accessories back in their assigned location after each project to reduce loss, mixing, and unnecessary handling.
- Symptom awareness: Record recurring signs such as loose connectors, damaged insulation, or unusual fan noise so repeated accessory problems are recognised without treating the observation as a diagnosis.
These habits support preventing accessory failures by reducing avoidable loss, contamination, and setup confusion before reuse. Persistent faults, repeated symptoms, or accessories that remain unreliable after routine maintenance still require a separate troubleshooting process.
These habits support preventing accessory failures by reducing avoidable loss, contamination, and setup confusion before reuse.
This chart shows two main categories of maintenance habits—inspection and cleaning, and organization and storage—that help prevent accessory problems and reduce setup failures.