
Raspberry Pi GPIO Accessories: Expansion Boards, HATs, and Connections
Raspberry Pi GPIO accessories are hardware components that extend a Raspberry Pi board's 40-pin GPIO interface so it can communicate with external hardware such as sensors, displays, relays, motors, and communication modules through its GPIO pins. These accessories include expansion boards, HAT boards, breakout boards, and connection components that expose, organise, or extend GPIO signals for different hardware applications. According to Raspberry Pi Ltd.'s HAT specification, a HAT (Hardware Attached on Top) is an add-on board designed to connect through the Raspberry Pi 40-pin GPIO header using defined mechanical dimensions and an identification EEPROM specification, while other GPIO accessories are not required to follow that standard. This introduction defines the overall scope of Raspberry Pi GPIO accessories rather than installation, configuration, or troubleshooting.
This introduction defines the overall scope of Raspberry Pi GPIO accessories rather than installation, configuration, or troubleshooting.
Raspberry Pi GPIO accessories support different methods of connecting a Raspberry Pi board to external hardware, with the appropriate accessory depending on the board model, GPIO header layout, software support, and the electrical requirements of the attached device. Expansion boards typically add interface circuitry or simplify wiring, HAT boards provide standardised hardware extensions that mount directly onto the GPIO expansion header, and breakout boards reorganise GPIO pins into layouts that simplify prototyping or external circuit connections. According to Raspberry Pi Ltd., the standard Raspberry Pi GPIO header contains 40 pins on current full-size Raspberry Pi boards that support the HAT specification, making the physical header the common connection point for many GPIO accessories. For readers exploring the broader Raspberry Pi ecosystem, the Raspberry Pi accessories hub places GPIO accessories within the wider range of Raspberry Pi hardware extensions while keeping this page focused on their purpose, categories, and connection roles.
Table of Contents
Understanding Raspberry Pi GPIO Accessories and Their Role
Raspberry Pi GPIO accessories are hardware components that connect to a Raspberry Pi board's GPIO pins to extend the board's interaction with connected devices through input, output, communication, or interface functions. They provide expansion functionality by exposing GPIO signals, simplifying electrical connections, or adding interface hardware while using the Raspberry Pi GPIO header as the primary connection point. According to Raspberry Pi Ltd.'s GPIO and HAT documentation, GPIO accessories interface with the board through the standard GPIO header, although the available functions depend on the accessory design rather than the GPIO connector alone.
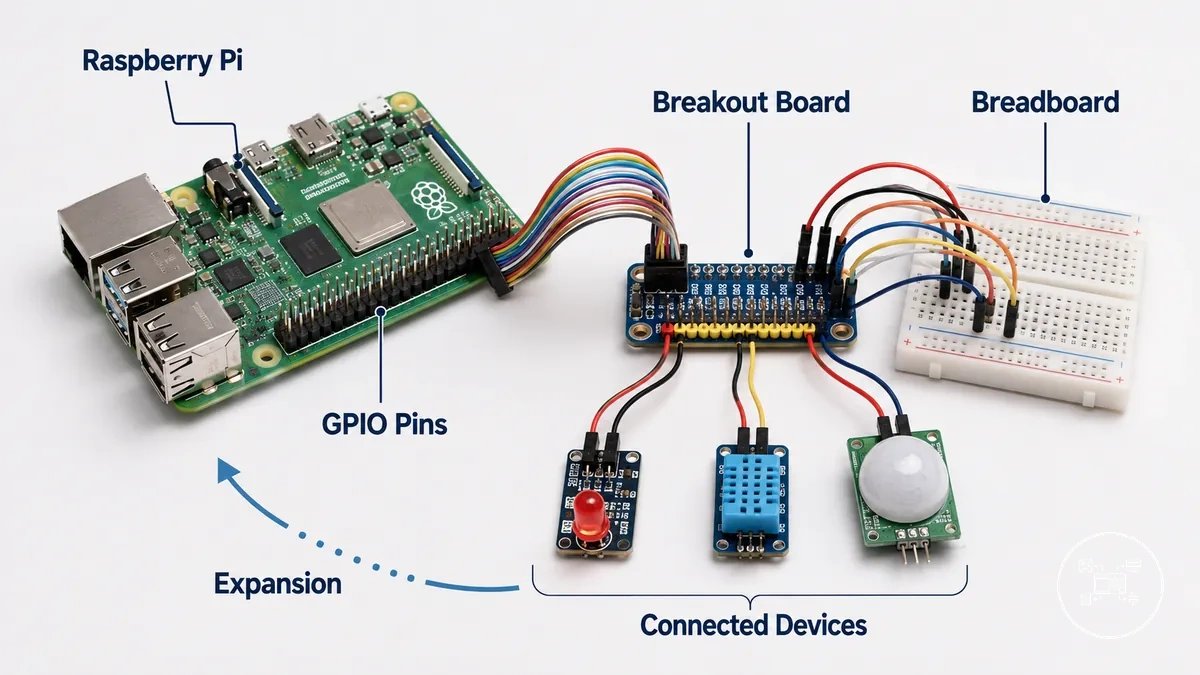
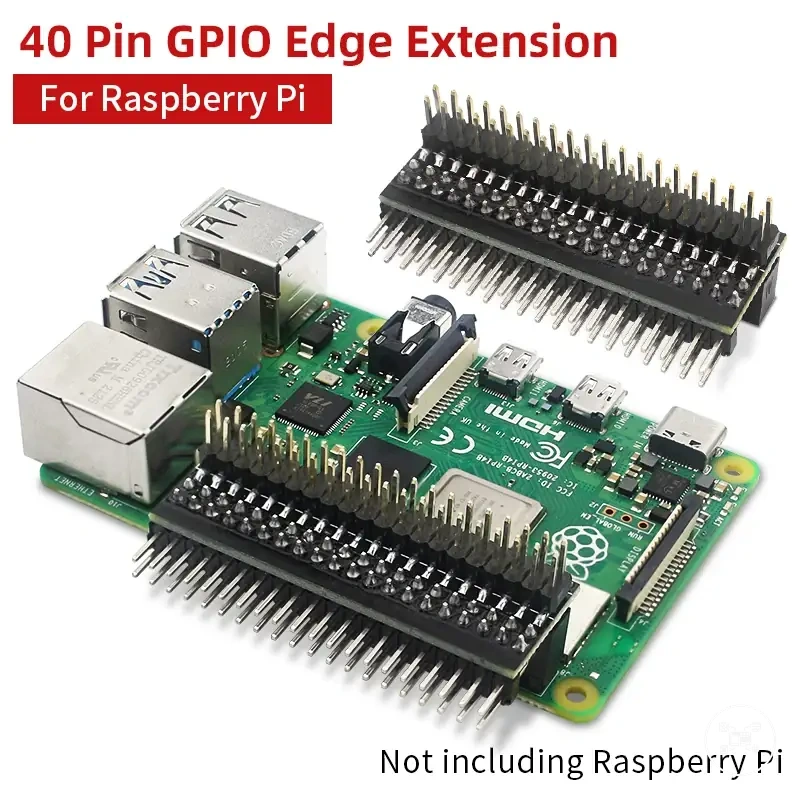
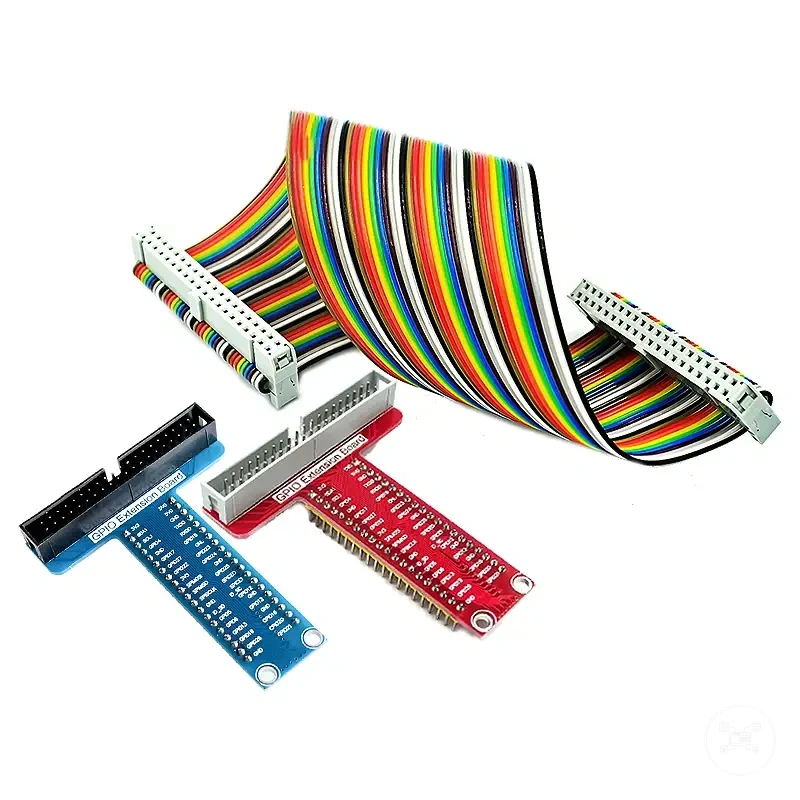
GPIO pins form the electrical interface between the Raspberry Pi board and external hardware, with the standard Raspberry Pi GPIO header providing 40 physical pins on current full-size Raspberry Pi models. Raspberry Pi Ltd. specifies that these pins include dedicated power, ground, and programmable GPIO signals, while certain pins also support hardware interfaces such as I²C, SPI, and UART. Raspberry Pi GPIO accessories use these predefined pin functions to connect hardware components rather than replacing them. For example, a 40-pin GPIO breakout board routes every header pin to a breadboard through a ribbon cable, allowing connected devices to be prototyped more easily while preserving the original GPIO pin assignments.
Raspberry Pi GPIO accessories use these predefined pin functions to connect hardware components rather than replacing them.
Raspberry Pi GPIO accessories include expansion boards, breakout boards, interface components, and hardware modules that extend access to GPIO pins without changing the Raspberry Pi board's core processing capabilities. Their role is to improve electrical connectivity, signal access, or hardware integration rather than to define software configuration, installation procedures, or board compatibility. Compatibility remains determined by factors such as GPIO header layout, supported electrical interfaces, operating voltage, accessory design, and software support, which are separate topics from the definition of Raspberry Pi GPIO accessories.
GPIO Expansion Boards, HATs, and Breakout Components
GPIO expansion boards, HAT boards, and breakout boards are the three primary categories of Raspberry Pi GPIO accessories, and they are distinguished by their connection method, expansion purpose, and interaction with connected hardware. According to Raspberry Pi Ltd., a HAT (Hardware Attached on Top) is an add-on board that follows the official HAT specification by connecting directly to the Raspberry Pi's 40-pin GPIO header and supporting an identification EEPROM, whereas GPIO expansion boards and breakout boards are not required to meet that specification. These categories provide different approaches to extending GPIO functionality rather than representing different GPIO standards.
These categories provide different approaches to extending GPIO functionality rather than representing different GPIO standards.
GPIO expansion boards typically extend connections by distributing GPIO signals, adding interface circuitry, or providing screw terminals and ribbon-cable connections for external hardware. HAT boards connect directly to the Raspberry Pi GPIO header and integrate hardware functions such as displays, motor drivers, or communication interfaces while complying with the Raspberry Pi HAT specification. Breakout boards expose the Raspberry Pi's 40 GPIO header pins through clearly labelled headers, terminal blocks, or breadboard layouts to simplify prototyping without changing the original pin functions. For example, a standard 40-pin breakout board maps all 40 header pins to individual breadboard connections, allowing engineers or hobbyists to access each signal separately during circuit development.

The following characteristics summarise how these GPIO accessory categories differ:
- GPIO expansion boards: Expansion purpose is to simplify wiring, distribute GPIO signals, or provide interface circuitry between the Raspberry Pi board and connected hardware.
- HAT boards: Connection method is direct attachment to the 40-pin GPIO header using the Raspberry Pi HAT mechanical and electrical specification, with hardware capabilities determined by the individual HAT design.
- Breakout boards: Expansion purpose is organised GPIO pin access for breadboards, test equipment, or terminal connections while preserving the Raspberry Pi's original GPIO assignments.
- Connection method: HAT boards mount directly on the GPIO header, whereas GPIO expansion boards and breakout boards commonly connect through ribbon cables, pin headers, or terminal interfaces depending on their design.
These category differences help define the intended hardware interaction rather than indicating product quality or capability. Breakout boards prioritise pin accessibility for prototyping, HAT boards prioritise integrated hardware expansion through the GPIO header, and GPIO expansion boards prioritise connection flexibility for attached devices. Selecting the appropriate category therefore depends on the required connection method, expansion purpose, and the type of external hardware being connected instead of assuming that one category is universally more capable than another.
Connecting Sensors, Modules, and Components Through GPIO
In a typical Raspberry Pi project, GPIO accessories connect the board to sensors, modules, and other external components by exposing the Raspberry Pi's 40-pin GPIO header in a more accessible form. According to Raspberry Pi Ltd., the standard 40-pin header combines programmable GPIO pins with dedicated 3.3 V, 5 V, ground, I²C, SPI, UART, and PWM-capable connections, so the interaction between connected hardware depends on selecting the correct interface, pin assignment, and operating voltage rather than using every GPIO pin interchangeably.
GPIO accessories support different connection patterns depending on the connected hardware and project requirements.
GPIO accessories support different connection patterns depending on the connected hardware and project requirements. Common usage scenarios include:
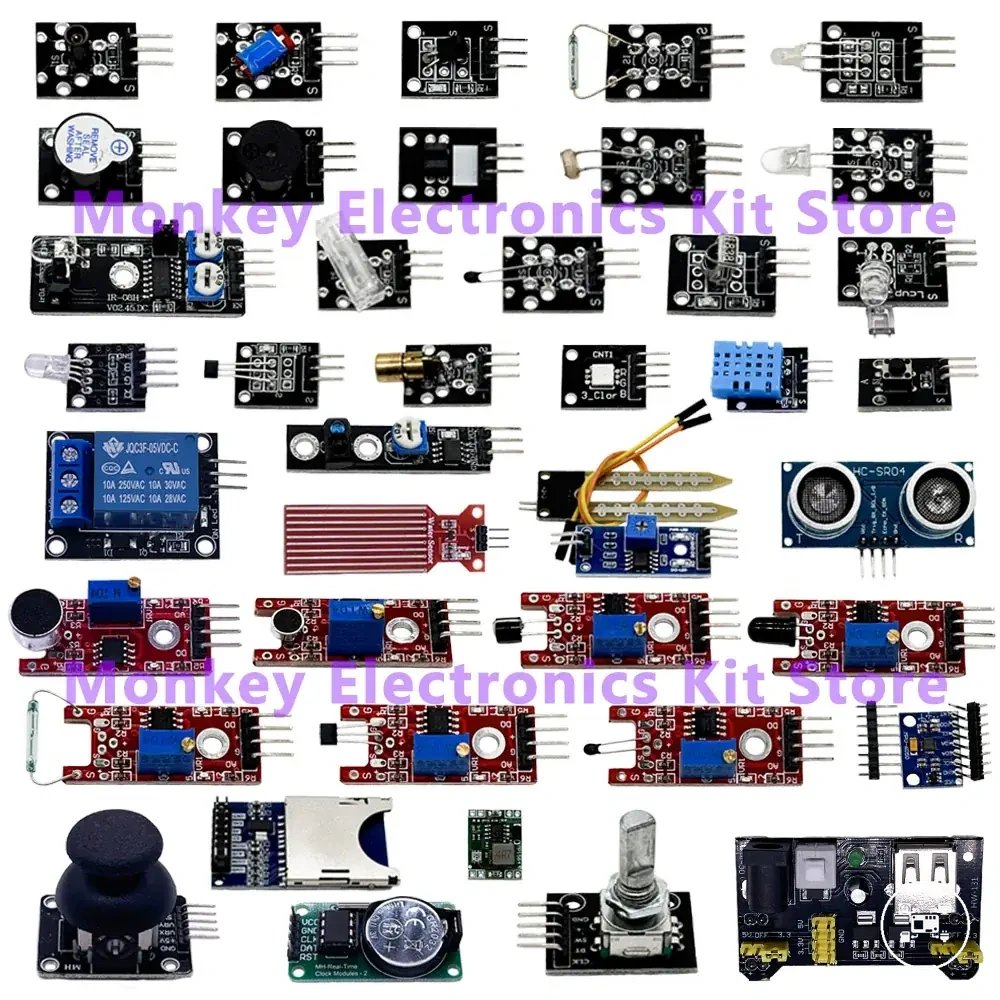
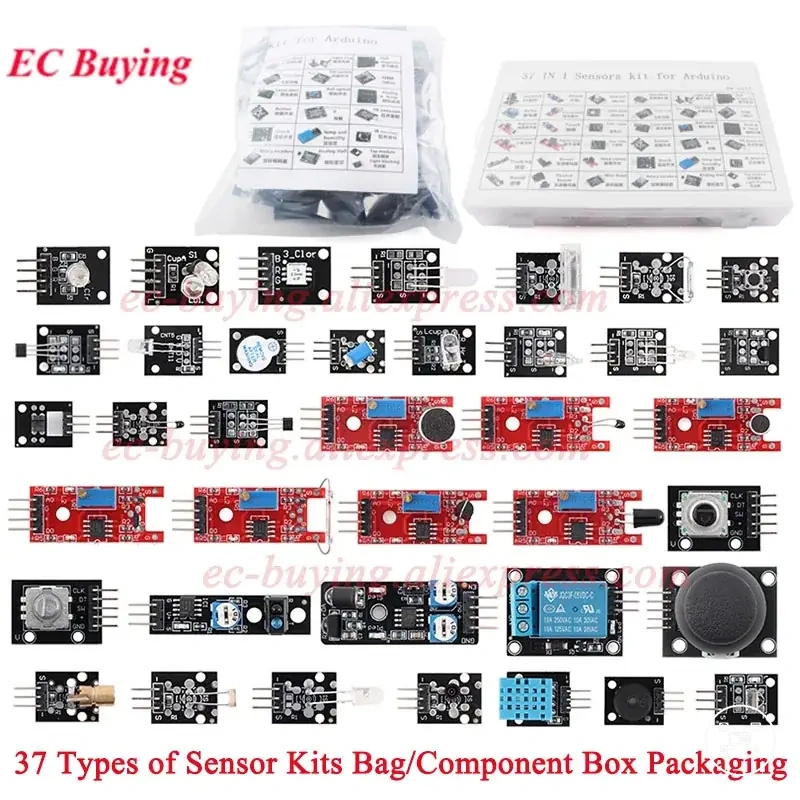
- Sensors: Temperature, humidity, motion, pressure, and light sensors commonly communicate through digital GPIO pins or serial interfaces such as I²C or SPI, depending on the sensor module.
- Modules: Relay modules, motor drivers, displays, GPS receivers, RFID readers, and communication modules typically combine GPIO control signals with dedicated power and ground connections.
- External components: LEDs, push buttons, buzzers, and similar peripheral components normally connect through breakout boards, expansion boards, or breadboards that simplify GPIO connections during development.
- Configuration condition: Successful interaction depends on matching the communication protocol, GPIO pin assignment, logic voltage, and software configuration supported by both the Raspberry Pi and the connected component.
GPIO accessories do not determine hardware behaviour by themselves because communication depends on the requirements of the connected device. For example, an I²C environmental sensor may share the SDA and SCL bus with multiple compatible devices, while a PIR motion sensor typically uses a single digital GPIO signal together with power and ground. Raspberry Pi Ltd. specifies that GPIO pins operate at 3.3 V logic, so connecting a native 5 V logic output directly to a GPIO input can damage the processor unless suitable level shifting or interface circuitry is used. Planning GPIO connections around project requirements helps reduce wiring conflicts, and project accessory planning provides examples of selecting suitable GPIO accessories for different applications.
GPIO accessories do not determine hardware behaviour by themselves because communication depends on the requirements of the connected device.
Readers who need complete wiring instructions, interface configuration, and software preparation should continue to the guide on setting up GPIO accessories, which covers the full installation process without repeating it here.
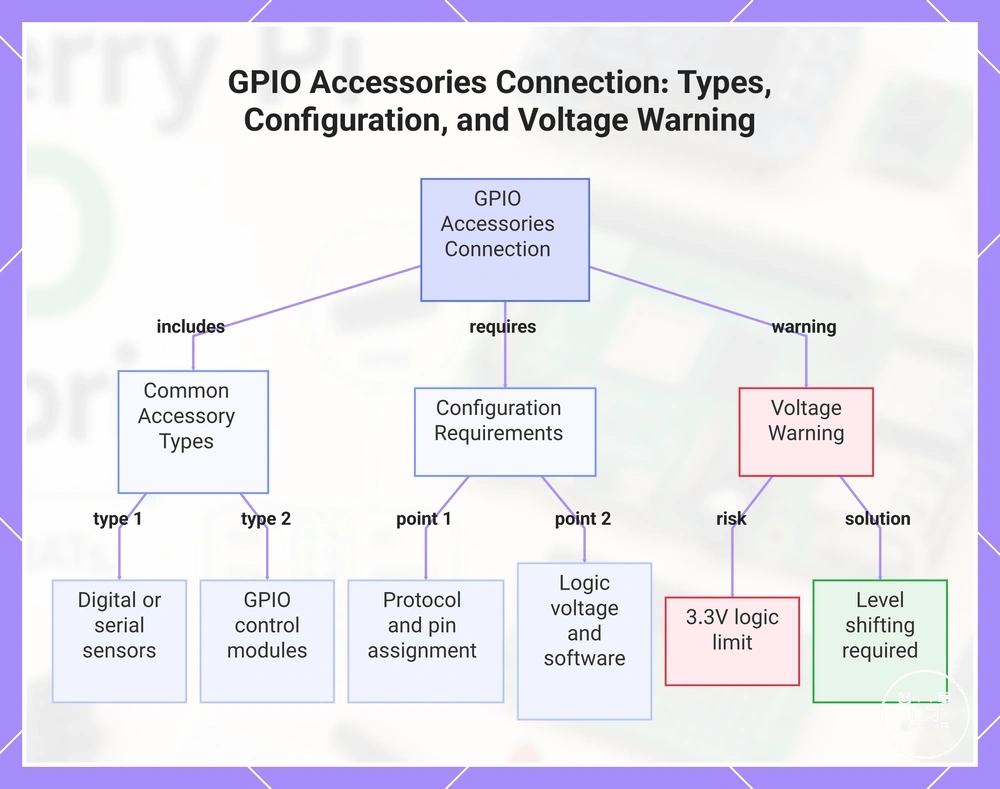
This chart shows the main types of GPIO accessories, the configuration requirements for successful interaction, and the critical voltage warning for Raspberry Pi GPIO connections.
This chart shows the main types of GPIO accessories, the configuration requirements for successful interaction, and the critical voltage warning for Raspberry Pi GPIO connections.
Raspberry Pi GPIO Connections and Compatibility Factors
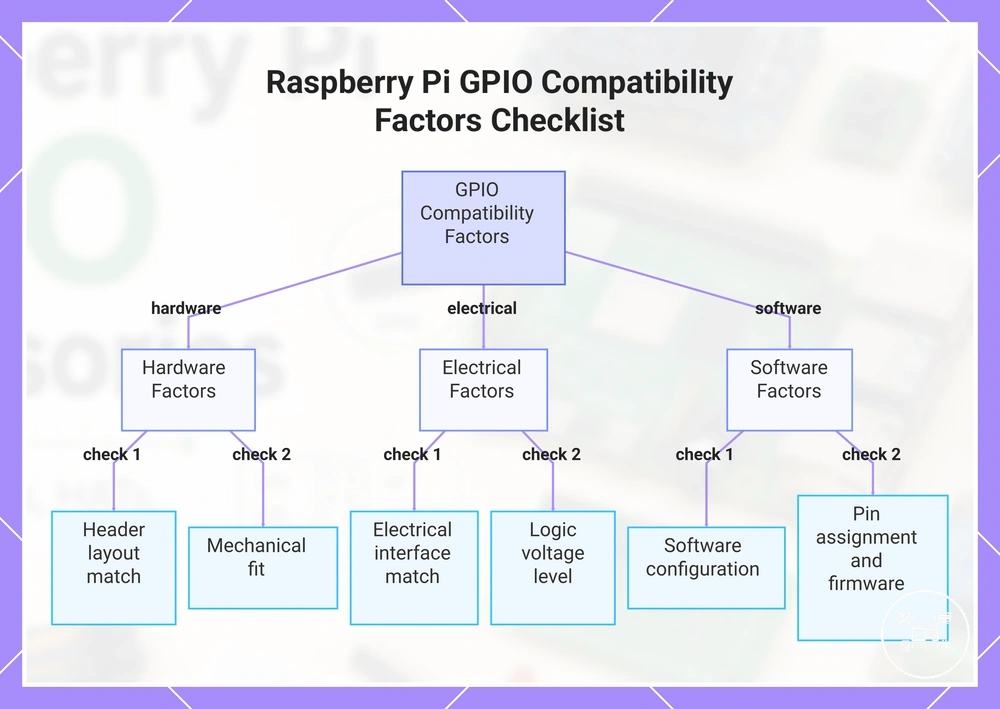
GPIO compatibility depends on matching the Raspberry Pi board, accessory design, connected hardware, and configuration rather than on the GPIO connector alone. According to Raspberry Pi Ltd., current full-size Raspberry Pi boards use a 40-pin GPIO header, while early Raspberry Pi models used a 26-pin header, so the board's header layout is the first connection requirement to verify. Electrical interfaces, logic voltage, wiring, mechanical fit, and software support then determine whether the accessory can operate as intended.
Electrical interfaces, logic voltage, wiring, mechanical fit, and software support then determine whether the accessory can operate as intended.
The following checklist organises the main compatibility factors that affect a GPIO connection:
- Header layout: The accessory must match the Raspberry Pi board's 26-pin or 40-pin GPIO arrangement, or use a documented adapter that preserves the required pin mapping.
- Electrical interface: The accessory and board must support the same GPIO function, such as digital input or output, I²C, SPI, UART, power, or ground.
- Logic voltage: Raspberry Pi Ltd. specifies 3.3 V GPIO logic, so a connected device with a native 5 V output requires suitable level shifting or interface circuitry before reaching a GPIO input.
- Mechanical fit: The board dimensions, connector position, case clearance, and stacking arrangement must accommodate the accessory design without obstructing required ports or headers.
- Software configuration: Interfaces such as I²C, SPI, or UART may need to be enabled, and the accessory may require a supported driver, library, firmware version, or pin assignment.
These conditions qualify GPIO compatibility because an accessory can match the physical header yet remain electrically or functionally unsuitable. For example, a 40-pin accessory cannot connect directly to a 26-pin header without adaptation, while a mechanically compatible module with a 5 V logic output remains unsuitable for direct connection to a 3.3 V GPIO input unless level shifting is provided. Wiring errors, conflicting pin assignments, unsupported software, or inadequate power delivery can also prevent correct operation even when the accessory fits the board.
These conditions qualify GPIO compatibility because an accessory can match the physical header yet remain electrically or functionally unsuitable.
Broader model, enclosure, power, and operating-system evaluation belongs in the dedicated GPIO compatibility checks resource rather than this GPIO-specific criteria summary.
This chart organizes the five main compatibility factors that affect Raspberry Pi GPIO connections, based on the official checklist.
This chart organizes the five main compatibility factors that affect Raspberry Pi GPIO connections, based on the official checklist.
Choosing GPIO Accessories for Different Raspberry Pi Projects
Choosing GPIO accessories should begin with the project's functional requirements rather than the number of features offered by an accessory. A suitable GPIO accessory is one that matches the required interface, connected hardware, and expansion capability for the intended project. According to Raspberry Pi Ltd., Raspberry Pi boards support interfaces such as GPIO, I²C, SPI, and UART through the GPIO header, so accessory selection should align with the communication method required by the connected device rather than popularity or product complexity. :contentReference[oaicite:0]{index=0}
A suitable GPIO accessory is one that matches the required interface, connected hardware, and expansion capability for the intended project.
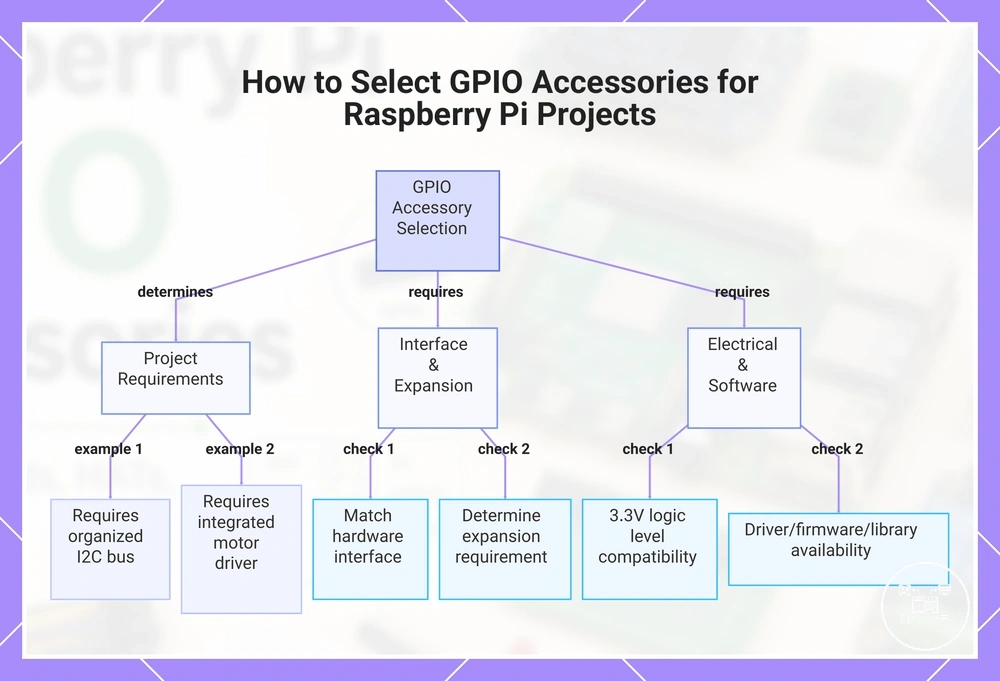
The following checklist organises the main selection criteria before choosing GPIO accessories:
- Project requirements: Define whether the project focuses on sensing, motor control, displays, communication, prototyping, or general input/output because each purpose requires different accessory capabilities.
- Connected hardware: Match the accessory to the hardware interface required by the device, such as digital GPIO, I²C, SPI, or UART, and verify that the accessory exposes or supports the necessary connections.
- Expansion capability: Determine whether the project requires simple GPIO access, additional interface circuitry, or integrated hardware functions so the accessory provides the required level of expansion without unnecessary complexity.
- Electrical suitability: Raspberry Pi Ltd. specifies that Raspberry Pi GPIO uses 3.3 V logic, so accessories connected to devices with 5 V logic outputs require suitable level-shifting or interface circuitry to protect GPIO inputs.
- Software support: Confirm that the required driver, firmware, or software library is available for the Raspberry Pi operating system and the selected accessory.
For example, a weather-monitoring project using four I²C sensors benefits from an accessory that provides organised access to the shared I²C bus while maintaining the same SDA and SCL connections for every sensor. By contrast, a robotics project controlling two DC motors is better served by an accessory with an integrated motor driver because GPIO pins alone cannot supply the current required to power motors directly. These examples demonstrate that project requirements determine accessory suitability, while the connected hardware determines the required interface and expansion capability. :contentReference[oaicite:1]{index=1}
Common wiring, configuration, and operational issues are covered separately in GPIO accessory troubleshooting .
Applying these selection criteria before purchasing or assembling a Raspberry Pi project helps reduce unsuitable accessory choices and simplifies later configuration without guaranteeing compatibility in every implementation. Common wiring, configuration, and operational issues are covered separately in GPIO accessory troubleshooting.
This chart outlines the main selection criteria for choosing a Raspberry Pi GPIO accessory, organized by project requirements, interface and expansion needs, and electrical and software compatibility.
This chart outlines the main selection criteria for choosing a Raspberry Pi GPIO accessory, organized by project requirements, interface and expansion needs, and electrical and software compatibility.
The products below are useful examples for comparing available options. Before buying, check that the compatibility criteria, key features, and product details match your needs.